Monday, December 28, 2009

Holy Bagels Batman!

Mix them, knead them, boil them, bake them, bagels have always appeared to be so hard to make.  I always safely went for the store bought kind until yesterday, when I came across the "Boiled Bagel" recipe in an old Hadassah Cookbook called "Sharing Our Best."  I realized that with a few modern convienences the bagels might not be such a challenge.  If you read through my process, you will be rewarded with an updated bagel recipe at the end.

A big turn off with the original recipe, written in 1970, was the 20 minutes of kneading after the dough was mixed by hand with a fork.  Despite many recent workouts at the gym, my arms are just too wimpy for that, plus, I've got things to do, like arm exercises.  I opted to try mixing and kneading with my Kitchen-aid mixer and boy, did that make the job easier.  I let the dough rise right in the mixing bowl. Then, I shaped the dough directly on my clean, lightly floured granite countertops.  *Note: I'm not trying to brag about my mixer and counters, I just want to show how the convienences of the modern kitchens can make this recipe flow. 

The next problem was how would I boil these things?  The recipe said to use a wide pan.  What does that mean?  My big frying pan seemed to shallow and my soup pots were all deep, but not wide enough. I used a wok.  It turned out to be a good choice.  I could fit four to five bagels in it at a time.  You only need to boil the bagels for a minute.  I used metal tongs and a flat turkey fork to pull the bagels out.  The recipe said to use a flat metal whisk, but I don't have one. *Tip my birthday is coming soon ; )
The recipe then said to drain the bagels on foil, so I laid out some foil on a wire cooling rack.  This worked out because I could add the toppings at this stage and they all stayed neatly on the foil.

I laid the cooling rack right next to my wok on the top of the stove.  I found that it worked best to keep the steps of the bagel making in one straight line in the kitchen.  The Kitchen Aid was by the sink, then the shaping station was next, the wok was right next to that, the cooling rack was next to the wok, and lastly the greased cookie sheet was at the end of the line. 


Here is a picture of the shaped dough with toppings.  I used Sesame Seeds, Rock Salt, and Chopped Onion. This is the most fun part, get creative with the toppings.  You can see how the bagels brown baking in the oven. 
I made two cookie sheets worth from my recipe and got about 18 bagels; you may notice from the pictures, not all of my bagels were the traditional torus shape, some were pretzels, some were bagel nubs. This is the delightful finished product. A day later, these are all gone.


And now... As promised:  
Bagels
(makes 18-24)
 
5 1/2 Cups of All Purpose Flour
2 Packets of Yeast
1/4 Cup Sugar
Warm Water
2 Eggs, beaten
1/4 Cup Vegetable Oil
1 Tbsp Salt
 
Toppings - Your choice, may include: Chopped Onions (dried or fresh), Sesame Seeds, Poppy Seeds, Garlic, Rock Salt, Fresh Parmesan Cheese, Cinnamon and Sugar, Sunflower Seeds, etc.
 
To Mix:
Sift, or if you don't have a sifter, like me, (*TIP, did I mention my birthday?) shake the flour out into your electric mixing bowl.  If you have one, put a dough hook on the mixer.  Make a well in the middle of the flour pile and add in the yeast. Put the sugar and 1/2 cup warm water in the well.  Let the yeast bubble a bit and then mix slowly for about 5-10 minutes.  Add in the beaten eggs, oil, salt, and 1 more cup of warm water.  Mix and knead in the mixer for 10-15 minutes.  Add a few tablespoons of water as you go if the dough is too dry. Every once in a while stop the mixer and scrape the sides and pull the dough off the hook so it mixes better.  The dough should be smooth and elastic. 
Cover the bowl with a clean dishtowel to let the dough rise for about 20-30 minutes.
 
Before you start shaping, fill your wok with water and a dash of salt and heat on a high heat.  You need a rolling boil for the bagels to cook properly.  It would also be a good time to preheat your oven to 400 degrees.
 
To Shape: 
If you have two cookie sheets, you can shape the dough all at once, but if you don't, split the dough and let half rise more while you shape and bake the first batch. Lightly flour a clean surface, a cutting board or a smooth countertop will do nicely.  Knead half of the dough to release any air bubbles. Divide into about 9 pieces.  Shape each piece into a rope about 8 inches long.  Cross the ends of the rope and wrap the rope under, tucking in the ends.  Press firmly so the bagel holds its shape.  You can also try other shapes, like a pretzel, or a bagel stick if you prefer.  Let rise until they have increased in size and are fairly light.
 
To Boil:
Make sure your wok is ready with the water boiling rapidly.  With floured hands, drop 4-5 bagels into the water.  Boil for 1 minute.  Remove from wok with tongs and a flat wire wisk or turkey fork.  Place on foil to drain. 
 
While the bagels are on the draining rack, get creative with your favorite toppings. Sprinkle whatever you choose on the bagels while they are still wet.
 
To Bake: 
Transfer topped bagels to a greased cookie sheet; Pam or Spray Olive Oil will work well for fast greasing.
Put the cookie sheet in the preheated 400 degree oven.  Bake for 25-30 minutes until golden.

Monday, December 21, 2009

New Cookbooks!

I got some new cookbooks for Hanukkah and Christmas and boy are my eyes tired. What a great set!

I recieved the new collection from the editors at Gourmet Magazine, Gourmet Today. This book is so comprehensive, I barely know where to start. All I know is that it is likely to become a new favorite.

Also, I got Top Secret Restaurant Recipes 2. The first recipe I plan to make from this book is the Red Lobster Cheddar Bay Biscuits for a certain Friend of Food who loves the things.
If this book works out, I am likely to save lots of money and calories by making my own versions of restaurant foods.

Lastly and perhaps most enjoyably I was given Hello, Cupcake. You all know my penchant for making my food into a craft project (see the tag bento for evidence of this.) I already have picked out a recipe that I may have the twins help me on for Christmas Eve. The only thing preventing me from making cupcakes today is the abundance of sweets on my kitchen counter (thank you K!) No worries, the future will include cupcakes... look out for edible cuteness on the blog.

Thursday, December 17, 2009

The Miracle of Hannukah Bento

Hannukah is a holiday about the miracle of lights. The Maccabees were able to fight off overwhelming forces to take back the holy temple from the Greeks who wanted the Jews to worship their pantheon of Gods. It is about keeping the holy flame lit in the temple during a war. Oil that was only supposed to last one day, lasted eight days, enough time to get more oil. In other words, G-d helped keep that flame a-glowing. It is a metaphor for keeping the light of Judaism alive in the face of powers that wish to squelch the religion.

My multicultural family celebrates Hannukah today with this festive Bento. Yes, I realize we are in full Los Angeles culture clash with this one. Almond butter and boysenberry jelly on wheat bread make fine dreidles. Thinly sliced baby carrots represent Hanukkah Gelt, the chocolate coins given to children to play dreidle with and for luck. The kids' daycare doesn't allow real chocolate, or the twins might have had a special treat in the lunch. They do have one surprise, apples are under the menorah. The menorah itself is made of edamame for the candles and sharp cheddar for the flame.
When I saw the edamame box in the fridge, I thought,
"Great, candles, but we have been eating these things so much, there's no way I'll have enough for two menorahs. I need eight candles, plus the shamus (the candle that lights the others) times two, that's eighteen edamame pods!"

As I was laying the candle pods out I found one damaged pod, oh no... but there were exactly eighteen good ones, nine for each box! It's a Hannukah Bento Miracle. This flame keeps a-glowing.

Monday, December 14, 2009

Busy Times

The holidays are always busy times. This year I have been blessed with more family time, a little freelance work (I am an Artist by trade), and the pleasure of living life. Yesterday we set up the Christmas tree, lit the candles on the menorah, and saw the Princess and the Frog; we are a multicultural family. We ate at The Counter,but more about that in a future post.
Husband of Food and I spent time with friends at their house in Torrance. I brought Muddy Buddies and found out who reads this blog regularly. I played a board game. I finished a book I could barely put down. If you are a parent with young kids, you may like it, too. I can't tell you how many times I laughed at this book thinking, "OK, so this happens to other people, too."

I chatted with Mother of Food. I let Husband of Food calm the overtired twins who were still up when we got home. I read an incredibly sweet post on the Mandicrocker Blog, featuring yours truly. Yesterday was a beautiful day. But enough about me... What's new with you?

Friday, December 4, 2009

Whipper Info

Son of Food posted the following to the "Comments" of the last post. The info is too good to be hidden away there, so I am posting it here on the front page. This information is for a whipper like this one, the iSi Gourmet Whip.

I did figure out my whipper problem from Thanksgiving, I wasn't taking the charger off before spraying. I had never actually seen one of these in action before. A bit of youTube reference revealed the secret. The following information gives us so much more to work with. Thanks, Son of Food!

Just checking in. So what you need to do, first, is be sure the canister isn't filled above the fill line, which should be 16 oz or 500ml for a 1 pt. whipper. I usually mix whatever I'm whipping in a measuring cup to be sure. The liquid shouldn't have lumps that might clog the dispenser, so strain if you're making something like avocado foam.

Attach the lid with a tip attached. Charge the canister by putting a cream cartridge (nitrous oxide) in the charging cylinder and screwing it in place, shake it up, and remove the cylinder. Don't shake too much. It may only need two or three shakes.

You can also make soda in the Gourmet Whip using soda chargers (CO2), but don't use soda chargers for things other than fizzy liquids, or they will create carbonic acid that will impart an undesirable flavor to things other than fizzy drinks.

To dispense the cream, hold the canister upside down, shake once to move the contents down toward the dispensing tip, and push the trigger slowly so you'll have some control over how much comes out. You can change tips once the whipper is charged. If you hold the canister with the tip up, the gas will be released, and the cream will be stuck in the canister, just like with a can of Redi-Whip.

Here's a website with some useful suggestions--

http://www.espumas.at/preparations/en/

There are some good videos as well on starchefs--

http://www.starchefs.com/product_education/iSi/whipper/html/index.shtml

This is an excellent collection of foam recipes in Spanish by Ferran Adrià, some of which appears in English translation on the isi site linked above--

http://www.cookingconcepts.com/PDF/Espumas_elBulli.pdf

This site has a compilation of recipes using hydrocolloids, including many foams that can be prepared in a whipper--

http://blog.khymos.org/tag/isi/

Friday, November 27, 2009

So Thankful

Yesterday's Thanksgiving was delicious. The best part was seeing friends before and family during the big meal. I am so thankful for all of my friends, family, food, and wine that I was blessed to be surrounded with this year.

The Sweet Potato Pecan Pie was a success! The Chantilly Cream with the iSi Gourmet Whip was not. I ended up with cream spatter everywhere and a charger discharged within momnets. After some research on the web, I think I know what I was doing wrong, but I haven't had a successful whip yet. I ended up with a nice cream anyway, thanks to a hand blender and some tenacity. Son of Food, please post a step by step on how to make the whipper work. Maybe with your guidance, next time will go better.

Wednesday, November 25, 2009

For Tomorrow; Sweet Potato Pie

This Sweet Potato Pie is ready for tomorrow. Chantilly Cream to be made then.

Wednesday, November 18, 2009

MandiCakes

A long time ago, at an improv audition far, far away, a friendship was formed between two food blogging giants. At the time, neither blogged, but both cooked, ate, and more importantly, laughed. Food was not what attracted me to the blond dessert maven you may know as MandiCrocker, rather it was her sparkling personality and terrific sense of humor; the sugar was just an added bonus to a pre-sweetended friendship.

MandiCakes is the physical manifestation of Mandi's sweetness. Her Cookies, Cakes, and Pies are simply stated, delicious. She has a "more is more" philosophy which brings good old fashioned homemade indulgence to her creations.

One my personal favorites is her Peanut Butter Chocolate cake made with chunks of Peanut Butter cups. The frosting is amazing. Most frostings are too sweet for me to eat much of, but this one I could eat all day. This unglamourous picture is of the cake Mandi made for my baby shower. We were lucky we got a shot of this cake at all, it was gone so fast.

Mandi does a mini cupcake version of this cake that is dreamy in it's own way.
Here it is now... The peanut butter cupcakes are rightfully in front.

Mandi's other cakes are terrific, too. The Red Velvet cakes with Cream Cheese frosting are another croud pleaser. You can see these yummies in the picture at the top of the post.

I am probably most fond of one of Mandi's most labor intensive treats... Her Cake Truffles. I liked the working title of these goodies better. Apparently "Cake Balls" aren't classy enough for the masses. I love them, under any name, though. They are bite sized chocolate/hard frosting coated cakes which are just as much of a treat for the eye as for the mouth. I really love the Grasshoppah Mint Cake Truffles, but the best part of the cake truffle experience is mixing up the different flavors.


Is your sweet tooth crying out yet? Mandi is creating platters and treats for the holidays. Check out her website for more information. http://www.mandicakes.com

Monday, November 16, 2009

Muddy Buddies Recipe

As requested, straight from the back of the Box... General Mills, please thank me... The recipe for Muddy Buddies.

I will print the half recipe version that I made, here:

9 Servings (about 1/2 cup each)


1/2 Cup Semisweet Chocolate Chips
1/4 Cup Peanut Butter
2 Tbsp Butter
1 tsp Vanilla
4 1/2 Cups of Chex Cereal (any Variety)
3/4 Cup Powdered Sugar


Measure Chex into a large bowl and set aside.

In a 1 Qt. Saucepan, heat the Chocolate Chips, Peanut Butter, and Butter over a low heat, stirring frequently, until melted.

Remove from heat and stir in Vanilla.

Pour Chocolate mixture over the Cereal, stirring until evenly coated.

Pour Mix into a 2 Gallon Food Storage Plastic Bag.
Add Powdered sugar, seal, and shake until well coated.

Spread mix out on parchment or waxed paper until cooled. Store in an airtight contained in the refrigerator.


1 serving = 5 WW Points, 220 Calories, Fat 9g, (Sat fat 4g, Trans Fat 0g), Fiber 1g, Cholesterol 5mg, Sodium 200mg, Total Carbs 30g, (Dietary Fiber 1g, Sugars 17g), Protein 3g,

Sunday, November 15, 2009

Muddy Buddies

I don't care, call it white-trash-junk-food, Muddy Buddies are awesome. I am so glad I only made half a batch. Who knows how many Weight Watchers Points are in there... OK, I'll calculate it... 5 points a serving, 9 servings in this 1/2 batch. 45 points in the pan, yikes!

I won't do it alone.

Between the kids, Friend of Food, and Me, these things may not make it 'till tonight. Husband of Food, I'll try to save you some. Come back soon!
Save me from this yummy batch of self destruction!!!

Tuesday, November 10, 2009

Free Krispy Kremes for Vets on Nov. 11


Free Krispy Kreme Doughnuts for Veterans and Military Personnel on Veterans Day!

This year, Krispy Kreme Doughnut Corporation is honoring America's service men and women on Veterans Day by giving away free doughnuts to all veterans and active military personnel. Veterans and active military personnel are invited to visit any participating U.S. Krispy Kreme store on Veterans Day, November 11, and enjoy one free doughnut of any variety.

"Krispy Kreme is delighted to offer free doughnuts as a small gesture to thank the dedicated men and women who have served, or are currently serving in the armed forces," said Ron Rupocinski, corporate chef for Krispy Kreme. "It is our hope that veterans and active military will visit a participating U.S. Krispy Kreme store on Veterans Day to enjoy a free doughnut, and maybe share stories about their service to our country. We salute each and every one of them."

Veterans and active military personnel will be able to select from more than a dozen varieties - including Original Glazed(R), Chocolate Iced Kreme Filled, Chocolate Cake, Pumpkin Spice and Glazed Raspberry Filled - that are available at most Krispy Kreme locations.

Saturday, November 7, 2009

Proud Saver

I will admit, I do not love the scrimping and saving, as I've had to do lately, but today I worked the system so well, I can't help but to be a Proud Saver. In the grocery store I bought $203.35 worth of food for $109.07. By using a combination of coupons, bonus cash, and grocery store specials I managed a $94.28 savings on the trip and in addition scored a "Rewards Voucher" of $20.00 to be used on a future trip. If you include the voucher, I saved more than I spent.

Included in the trip were plenty of staples, meats, diapers, treats for the Dog,and enough Diet Coke to serve Husband of Food and myself for several weeks, which my friends, is a lot of Diet Coke.

Some of the coupons came from the Sunday paper, some from grocery store mailers, and some from the sources found in the blogpost Food and Grocery Coupon Conglom-o-rama This trip made me appreciate my thrifty side. I wish you all your own proud savings.

Wednesday, November 4, 2009

Getting Back on Track with 1 Point Muffins


October was an especially difficult month for me. I still had no job, freelance hopes were dashed, and I lost Father of Food. Needless to say, I ate.

October was also a time of celebration, the twins turned three, many little friends had birthday parties, and of course we celebrated the joy that is Halloween. Needless to say, I ate.

October also happened to be the month where, due to death, sickness, and poverty, I most often found myself without a break as full time Mommy of my three year old twins. Needless to say, I ate.

I have been exercising more than usual, but needless to say, I gained.

This week I started to turn back the flow of calories by going back to my old Weight Watchers habits and have begun again to count the points of what I eat.
Today I made one of my favorite low point snacks, 1 Point Muffins. Now I use the term "muffin" loosely, since the plain version of these is more like a biscuit. It is a great grab and go food and since you make it yourself, it doesn't cost a fortune.

This muffin recipe originated from the
1998 version of The Weight Watchers New Complete Cookbook.
There is a new version of this book out,


however, I am not sure if it has this recipe and I know it doesn't have my 1 point version, so I will share it here to help all of you folks looking for a great low cal snack:

Plain Muffins:

Makes 24 Servings - 1 Point each

1-3/4 cups of flour
4 tsp granulated sugar
2 tsp baking powder
1/2 tsp salt
1 Cup fat free milk
1 egg
4 tsp unsalted butter, melted

1. Preheat oven to 400 degrees.
2. Spray a 24 cup mini-muffin pan with nonstick cooking spray (I use a silicone pan with spray)
3. In a large bowl, combine flour, sugar, baking powder, and salt.
4. In a small bowl combine egg, milk, and butter. Pour over the flour mixture and stir, just until blended (do not overmix).
5. Spoon the batter into the cups, only filling the cups until they are just to the top, not over the sides.
6. Bake 20-25 minutes.


Now I'm back on track with a 1 point snack. I just need to be careful not to eat all 24 muffins by myself.


Monday, October 26, 2009

Spongebob Square Lunch


So, now it's about food... In honor of the release of SpongeBob's Truth or Square Videogame
,I am releasing, Spongebob Square Lunch!

Ingredients:
Almond Butter and Jelly sandwiches on Wheat Bread with Strawberry and Boysenberry Jelly for shading
String Cheese for the nose
Toasted Seaweed for background and eyelashes
Eggs for eyes with blue food coloring for the irises and olive tapenade for pupils, also eggs for teeth and shirt
Tomato for tie
Veggie Sticks for arms and legs
Food color for painted on squarepants!

Spongebob Truth or Square Ships!

OK, this is more Family than Food, Spongebob Truth or Square Shipped today. It is now available everywhere fine videogames are sold. You can get yours at these convienent amazon links. Daughter of Food especially reccomends playing level 6 and 7.

Friday, October 23, 2009

Honor Thy Father

This is the hardest post to write. I have been avoiding the blog for weeks because I wish to sojourn in the land of Egypt, you know, the land of de-Nile. When I pick up the phone to call him, or plan my next trip to Vegas, or get a sympathy card, or write this blog, it all comes back.
I just want it not to be true, but it is.

Father of Food passed away on October 5th.

He will be missed, remembered, needed, yearned for, but never forgotten.

Here is a chronological list of Dad's posts:
Priorities
A Real Cut Up
Hidden Treasure
Dining Sicilian Style
Special Hint
Oh My, What a Pie!
Mom's Night Out
Ole
Small Plates---BigTaste
Basil-Pesto (Recipe)
Size Matters
Food
24/7 Mandalay Bay
This Ain't Your Big Mac
Diet Rules For Cheaters (unknown)
True Confessions
Boo
Thanksgiving - common problems - simple solutions
The Deli Experience
Patio Dining on the Strip
Hammy Hannukah or (Chanukah)
Good - Better - Best
Pizzacue
24/7 Venetian
Zoozacrackers
Aunt of Food
Vintage Vegas
O Sole Mio! (Recipe)
Good Company
Passover Recipe (Recipe)
Passover Recipe Matzo Brie (Recipe)
Did I say smear?

Saturday, October 3, 2009

Baby Food

Yesterday at lunch, my girl said "Mommy, this is my baby." She says, while pointing to the top where she had squished down the bread, "Here are her eyes." She says pointing to the big piece of bread in the middle, "This is her body." She points to the peas "these are her buttons." This baby has a lot of buttons. Then disturbingly she says as she points to the bits around the main form, "These are her spiders." What does that mean?

Without missing a beat, my daughter and her sister put the baby to bed by covering her with a paper towel.

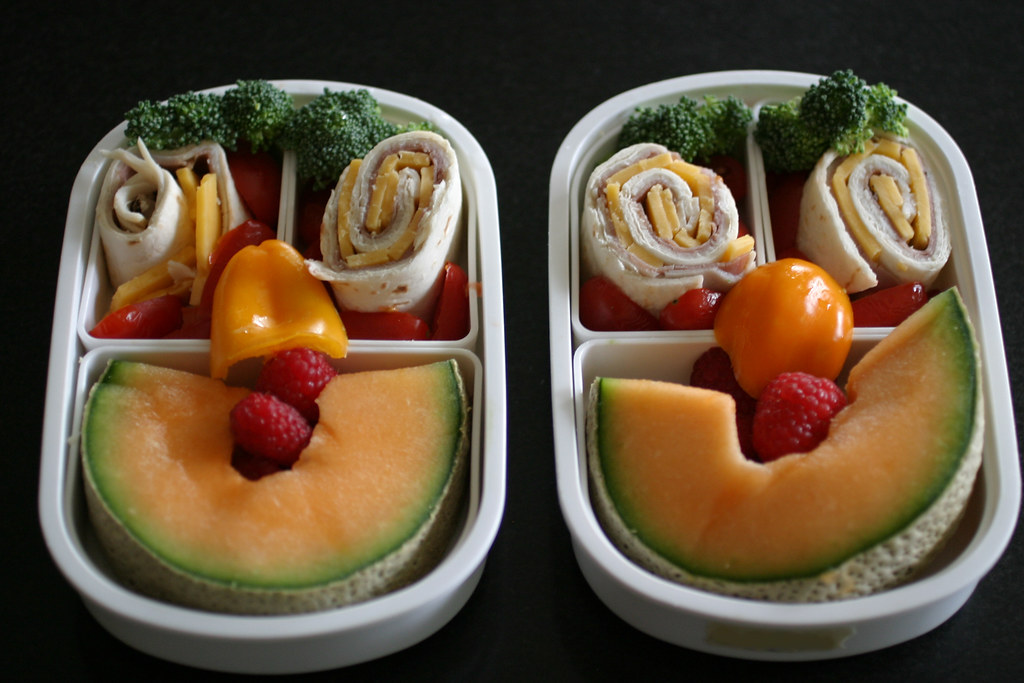
"Wait!" she says, "We forgot to give the baby her lovey." and she places the blue spoon in the crook of the bread arm.

I think the bento designs are influencing the twins. All kids play with their food, but I think my not quite three year old is destined to be an artist.

Tuesday, September 29, 2009

Owl Face Bento


Last night my daughter mentioned to me that she loved the funny face bento I made her. That comment inspired me to do another. This healthy bento box she named the Owl Face Bento. It includes:
Broccoli
Cantaloupe
Grape Tomatoes
Raspberries
Yellow Bell Pepper
Turkey, Roast Beef, and Cheddar Wraps

Friday, September 25, 2009

Bento Collection


This is a collage featuring some of the Bento I made for my twins. You can find most of them on this blog. Check the Bento Boxes tag for these and more.

Tuesday, September 15, 2009

Taking Stock

In our modern world of convenience, certain culinary standbys have gone by the wayside. One such staple often found in yesterday's kitchens is Chicken Stock or Broth. With the ease of bullion cubes, boxed stock, and canned soup, one might never even think to make homemade stock. With the economy the way it is, more and more people are realizing that there might be more to that chicken long after the breast or the drumsticks are gone. "Waste not, want not" is a popular notion these days. My Brother wrote a terrific post about some more advanced things to do with stock called "Too Good to Throw Away," but how does one get the stock in the first place?

When I make my broth, I like to start with two things, the recipe laid down in Chef Paul Prudhomme's Louisiana Kitchen and the leftover carcass of a chicken from the grocery store.
I will paraphrase my own version of this recipe to follow along with my pictures, but I highly recommend you get your own copy of this brilliant book. The country biscuit recipe alone is worth the cost, plus I just noticed that on Amazon, there are used copies for under a dollar.


Put these next items into a large pot.
An onion into quarters,
A clove or two of garlic, cut into a few pieces
A rib of celery sliced up
A carrot or any leftover veggies to add flavor

Add the Chicken to the pot and cover with cold water.

Bring pot to a boil.
Then cover the pot with a lid and simmer for 4 - 8 hours adding a little water every so often if the soup gets too low. You are going for a quart of stock at the end.

After the soup has cooked, strain it to get just the broth. The way I do this is to put a large bowl under a colander and spill the soup into that. If I am making soup, I reserve the matter in the colander so I can add some meat and veggies back into the soup. If I am storing the stock for later use, I put the broth into freezable containers and toss the rest.

This latest batch of stock I turned into Matzo Ball Soup and to celebrate the Jewish new year, I will share that preparation with you.
After the good pieces of meat were added back into the stock, I seasoned the soup with salt and fresh ground pepper.
Then I followed the recipe for Matzo Balls found on the can of Matzo Meal. Manischewitz won't mind, if I share it with you, right? After all it sells more matzo meal....

2 Tbsp Vegetable Oil
2 Large Eggs, slightly beaten
1/2 Cup Matzo Meal
1 tsp Salt (if desired)
2 Tbsp Soup Stock or Water
Blend vegetable oil, eggs, matzo meal, and salt together.
Add soup stock or water and mix until uniform (delete this step if you prefer harder matzo balls.)
Cover and place in refrigerator for 15 minutes.


Bring soup to a brisk boil. (The original recipe says to boil in water, but the stock makes the balls better)
Reduce flame and drop balls approximately 1 inch in diameter formed from refrigerated mixture.
Cover pot and cook 30-40 minutes.


Enjoy a lovely bowl of homemade matzo ball soup!

Saturday, September 12, 2009

First Day of Dolphin-hood


It was the first day of the new school year and the Twin Girls are now Dolphins!
Commemoration seemed necessary, so to the bento I went. Having gotten back from a ten day trip the evening before their first day, I had to rush these and make do with the small stock I had in my kitchen.

Here's what I used to make these boxes:
Almond Butter and Jelly Sandwiches for the Dolphins
Roasted Seaweed Paper for the facial features and the background
Provolone for the waves
Goldfish Crackers for the underwater fish.

Mandarin Oranges were included on the side.

Thursday, August 27, 2009

Can I Bake a Cherry Pie?


Sister in Law of Food invited me to a BBQ and asked me to bring along a dessert. I have never made a cherry pie before, but I had about two pounds of lovely fresh cherries and it seemed like a classically good summertime treat.

I broke out several cookbooks to search for a simple answer to my question, "Can I bake a cherry pie?" My choice was easy, I picked Amy Sedaris's
I Like You: Hospitality Under the Influence , a highly entertaining and surprisingly effective cookbook by the star of Strangers with Candy.

"Antonia's Cherry Pie" was the name of the recipe, and making the pastry dough was a snap in my kitchen aid. The filling was quite simple as well, except for the pitting of the fresh cherries. Starting with a paring knife, I struggled roughly pitting a few, by cutting them in half and removing the stone as cleanly as I could. It took a lot of time to do this and I figured there must be an easier way. I ended up watching many youtube videos on the subject and came upon this little gem.


I used a new paperclip, washed for safety, and found this method highly superior to the knife. It still took about half an hour to pit the two pounds of cherries, but if you don't own a cherry pitter like the Leifheit Cherry Stoner, the paperclip will work fine. One tip, if you have them, try a few different sizes of paperclips on your cherry until you get the one that's comfortable to work with, but that won't split the cherry.

I used youtube to learn more about crimping and latticing the crust. Unfortunately, I saw the crimping video after I laid out the bottom crust. I had not left enough dough around the edges for good crimping, but I adjusted as much as I could with what was there. It was not so pretty a pie, but in the end, I was thrilled with how it came out.

When I tasted it, I realized, this was the first fresh cherry pie I had ever tasted. All of the cherry pies I have ever eaten, at restaurants, from the grocery store, from the freezer... they all use canned or frozen cherries. Fresh Bing Cherries so far surpass frozen or canned cherries, it is like eating a completely different food. Furthermore, I noticed as I ate the pie, the more whole and complete the cherry was, the better it tasted. The whole cherries would pop in the mouth releasing the juices in a delicious rush. The buttery lattice crust with raw sugar sprinkling was the perfect accompaniment to the darker sweetness of the fresh cherries. All of the hard work pitting the cherries as cleanly as possible turned out to be well worth it.

So to answer the question, I can bake a cherry pie, as long as I have a paperclip handy.


Tuesday, August 25, 2009

Bunny Bento Boxes


Today is the last day in the school year at daycare for my twin daughters. This past year they have been bunnies and are soon to become dolphins. In commemoration of my daughters' last day of Bunnyhood, I made this special bento lunch.

The bunny boxes include:
Rice
Spinach
Raspberry
Turkey and Cheese Wraps
Chicken Bologna


I also included a side of Mandarin Orange cups to round it out.
I wish them a magical bunny day.

Sunday, August 23, 2009

How sharp do knives need to be?

Since last week's post about Japanese knife sharpening techniques, I've been thinking about how sharp knives need to be, and tonight it all clicked. Sharp knives, aside from being safer and more efficient to use than dull knives, make food more attractive and contribute to the texture of the final product. But how sharp is sharp enough?

I remember with my old sharpening technique, a friend who sometimes worked as a professional cook was watching me cleanly slice a ripe tomato with my chef's knife, and said, "that's a sharp knife!" and it seemed so at the time.

When I started using a Japanese waterstone instead of the oilstone, I realized that I could dice a ripe tomato neatly, stacking two or three slices, cutting them first like french fries, and then dicing them crosswise. I could dice a tomato before, but not as quickly, cleanly, and effortlessly.

Tonight I was making leftovers. I had some tomato sauce from chicken cacciatore I'd made last week, and some grilled leg of lamb, so I thought I'd cut up the lamb and make a ragout to serve over pasta. I also had some very ripe tomatoes from the farmer's market to add to the pot. Tomatoes should be peeled before going into a sauce, or the peels become like little slips of paper, and the usual way to this is by blanching them briefly in boiling water, but for two or three tomatoes, it adds a lot of extra time to boil a pot of water. With my newly refined sharpening technique, I thought I'd see if I could peel them with a knife, and I did it with very little waste using the Henckels Four-Star 8" chef's knife that I've had for around 20 years, and it took less time to peel three tomatoes than it would have taken to boil two quarts of water. Then I could take these peeled ripe tomatoes, which are even softer than unpeeled ripe tomatoes, and dice them quickly, cleanly and effortlessly.

I used to think my knives were sharp enough, but now I'm doing things that with my old technique just wouldn't have crossed my mind.

Wednesday, August 12, 2009

Ohe San: Japanese Knife Sharpening

For years I sharpened my knives on an oil stone--one side coarse, one side medium--holding the knife at as close to a 22.5 degree angle to the surface of the stone as I could visualize, moving it from heel to tip always in the direction of the blade to avoid feathering the edge, and it worked pretty well. My knives were pretty sharp, and people who saw me using them or joined me to cook in the kitchen generally thought my knives were pretty sharp. But lately, there has been a lot of interest in the culinary world in Japanese knives, and you have to admit that Japanese sushi chefs are masters of fine precise cutting and elegant garnishing, which require very sharp knives. Japanese knives are generally made of harder steel than European knives, so they are more brittle, but they can hold a sharper edge at a finer sharpening angle. They are also usually beveled only on one side, like a chisel.

I've been thinking one day of investing in a few Japanese knives, but first I wanted to work on some Japanese knife sharpening techniques and see if I could make the knives I already have sharper. I visited Manhattan's fantastic Japanese knife shop, Korin, in Tribeca to obtain a two-sided Japanese waterstone, 1000/6000 grit. This is much finer than my old oilstone, but it cuts cleanly and quickly. Japanese knife sharpeners usually work from the tip to the heel, always applying pressure on the forward stroke with the fingers on the section of the knife contacting the stone, building a burr all along the unbeveled edge, and then removing the burr and finishing the backside of the knife. I tried this approach, still always moving the knife in the direction of the blade, which meant switching hands to sharpen both sides of the knife. This is a bit awkward, but I've been getting better results than the way I'd been doing it before. Sometimes I can get a blade razor sharp this way--not just metaphorically, but really sharp enough to shave with--but not consistently. Sometimes razor sharp is too sharp, because the edge can chip when the knife is used for heavier tasks, but it's good to know how to make that kind of edge.

Today I met Mr. Ohe, from the Kikuichi knife company in Sakai, Japan, at a demonstration organized by The Brooklyn Kitchen. Representatives from Kukuichi discussed the history of the company and Japanese knife making, and Mr. Ohe demonstrated knife sharpening and hand engraving. A prizewinning sushi chef was on hand to demonstrate what these knives can do, and knives were available for sale at a discount with free engraving by Mr. Ohe, shown above.

What I found most interesting was that Mr. Ohe did not observe the principle I've always followed of always moving the knife on the stone in the direction of the edge. Here he is, forming the bevel by pushing the knife away from his body on a coarse waterstone, toward the spine of the knife rather than toward the cutting edge--
The best part of a workshop like this is that we could pass around the knife as he was building up the burr on the flat side and feel how pronounced it was--much more so than the burr that I was forming using my technique. The burr is difficult to show in a photograph, but you can feel it with your fingers--carefully to avoid being cut. When the burr formed all along the edge, he removed it and finished the back side of the knife--about one stroke on the flat side (which is actually slightly curved to keep food from sticking to the knife) for every nine strokes on the beveled side of a single beveled Japanese knife. He used a relatively small amount of water when forming the burr on the first side, and then a lot of water when finishing the back side. For Western style double-beveled knives, he recommended an equal number of strokes on each side. He did not switch hands, so on the first side he was pushing the knife away from the sharp edge, and on the second side he was pushing the knife toward the sharp edge, so that any feathering that would result from sharpening the first side would be cleaned up when sharpening the second side. To give the knife a polished edge, he followed this procedure first with a coarse stone if needed, then with a medium stone (1000 grit) and finally with a fine stone (5000 grit)--
Note that he always maintains the same 45-degree angle of the knife to the direction of travel of the stone (not the bevel angle, which should be around 22 degrees for Western knives and around 15-17 degrees for harder Japanese knives). I asked if this was appropriate for a European chef's knife, because the curve changes from the tip to the heel, and he said (through a translator) that he always worked with the blade at this same angle to sharpen the largest possible section of the blade at once.

I went home and soaked my waterstone and tried this technique with two knives that I'm never quite satisfied with--a Wusthof paring knife and a Sabatier boning knife. Maybe it is because they are small and flexible that they aren't as easy to sharpen as a thicker chef's knife, or maybe it's because I use the chef's knives more often, so I'm more practiced at sharpening them. Now those little knives are razor sharp. I think I've got a new sharpening technique.

I'll work with this a bit more, and then I'll sign up for a workshop at Korin, where I bought my waterstone. Then maybe I'll be ready for a Japanese knife.

UPDATE: I've written a follow-up to this post in the next blog entry.

UPDATE: After doing this for some time, I've come to the conclusion that with a European knife that has a bolster, it is necessary to adjust the angle of the blade with respect to the direction of travel, otherwise there will always be a section on one side of the knife that is unsharpened, and looking at other videos of Japanese style sharpening, it does seem that people who know what they are doing don't always maintain the 45-degree angle, particularly if the blade is curved.

Saturday, August 1, 2009

Car Wash Tacos

The other day, I got my husband's car washed. It was a "pay it forward" type of situation as my car had been suprise-washed by my Father in Law just the other day. He's so nice, right? So I decided to do the same for Husband of Food.

Anyway, I was doing this over my lunch hour, so I decided to snag a couple of tacos at the car wash cafe.

I walked into the small lunchroom, overheated from the grill, and made my order at the Playa Vista Deli. I hunkered down at the window overlooking the cars being washed and I ate my lunch. Yeah, I know, I wasn't expecting much either, but holy guacamole, Batman, these were great tacos! The cook put great care into these $2.25 a piece treats and like a fine chef, inquired about my experience after I finished my meal. Did I mention that I was at a car wash? The tacos came on two soft tortillas with flavorful chicken, cabbage, cheese, and fresh avocado on top. I got the hot sauce on the side, which I liked because it tasted great, but on the side I could control the heat to my personal perfection.


If you need to wash your car on your lunch hour, you can do it at a place with some great tacos.


(The car wash was pretty good, too)


Playa Vista Deli (Attached to the Playa Vista Car Wash)

6920 S. Centinela Ave.
Culver City, CA 90230
(310)737-1013

Found on the Family of Food Map

Thursday, July 30, 2009

Gazpacho Foam

For everyone who has been following Father of Food's health situation it looks like with exercise and therapy his swallowing is improving, and he is able to taste food again in the form of thickened liquids and purées, but he's keeping the feeding tube for now, because we know that his condition may worsen again.

Meanwhile, I've been thinking about what he might be able to eat that could offer the taste and aroma and textures of food without ending up in the lungs, and it occurs to me that the answer may not be in bland hospital foods, but at the cutting edge of the culinary arts, in the field of "molecular gastronomy," experimentation with science and food--food that does not even attempt to satisfy hunger, but food for food's sake. The "thickened liquids" that Father of Food has been drinking, after all, are thickened with many of the same hydrocolloids that avantgarde chefs like Ferran Adrià, Grant Achatz, and Wylie Dufresne have been playing with. Perhaps some restaurant critics think that Adrià's espumas and foams that became popular in the mid-1990s are a bit passé, but what could be more ideal for Father of Food than something intensely flavored and without any substantial mass? Of course we'll have to confirm that with his doctors and the speech therapists who work with him on his swallowing, but it seems promising, and it's always fun to learn to make something new.

Foams are typically made from liquids thickened with starch, fat, egg whites, or hydrocolloids like gelatin, agar agar, xanthan, carageenan, and other food stabilizers that may be familiar from processed food labels, but are generally naturally derived from plants or algae. They may be whipped with a blender or in a nitrous oxide cream whipper. A cream whipper like those made by iSi can whip cream to five times its original volume, or around twice the volume of cream whipped with a whisk or an electric mixer. The one that I use is the iSi Thermo Whip, which is also a thermos flask that can keep ingredients hot for three hours or cold for up to eight hours. The contents are protected by the nitrous oxide gas, so they taste and look fresh when dispensed.

While this all seems new and exotic, it is not that hard to make a foam. My first foam was simply mashed potatoes, served hot and whipped lighter than any mashed potatoes I'd ever had. It was perfect as a side dish where I might want the flavor and texture of potatoes without getting filled up on potatoes. It also worked cold as a garnish for a cold cucumber soup.

To make the gazpacho foam pictured above, blend at high speed about 1/3 cup chopped onion and one clove garlic with about 1/3 cup beef consommé and the juice of one lemon. Add about 2/3 cup tomato and an equal amount of peeled cucumber and blend thoroughly. Add marjoram, black pepper, sea salt, and piment d’Espelette or other hot pepper or Tabasco to taste. Dissolve 2g Knox gelatin in about 1/4 cup warm beef consommé, and blend into mixture. Strain and chill.

Pour one pint of the mixture into the 1 pint Thermo Whip, charge with one N2O charger, and shake vigorously, then turn the Thermo Whip upside down and shake a couple of times to bring most of the liquid to the spout. Release the foam gently at first to produce a controlled spray. If dispensed at this point, it will be drinkable. For a firmer foam that can be eaten with a spoon, allow Thermo Whip to rest in the refrigerator overnight on its side. Shake vigorously and dispense into a cocktail glass garnished with a cucumber slice and a spear of red bell pepper.


Bookmark This Site


Powered By Blogger