
Early this week I made two pastry based dinners and let's just say they worked out. No leftovers. Couldn't even get a pic. One was a pastry wrapped shredded barbecue beef, the other dish was chicken pot pie in individual casseroles. Here's the great thing... they were both deceptively easy to make.
I made the pastry from a Kitchen Aid recipe and once that was done, the rest was easy as pie.
Here is the recipe for the Kitchenaid Pie Pastry:
Makes 2 crusts
2 1/4 cup of all purpose flour
3/4 tsp salt
1/2 cup shortening, well chilled
2 TBSP butter or margarine, well chilled
5-6 TBSP cold water
Place flour and salt in mixer bowl. Attach bowl and flat beater to the mixer. Turn to stir speed and mix about 15 seconds. Cut shortening and butter into pieces and add to flour mixture. Turn to stir speed and mix until shortening pieces are the size of small peas, 30-45 seconds.
Continuing on stir speed, add water 1 TBSP at a time, mixing until ingredients are moistened and dough begins to hold together. Divide dough in half. Pat each half into a smooth ball and flatten slightly. Put in a ziplock or wrap in plastic wrap. Chill in refrigerator for at least 15 minutes.
In the recipe, the dough was split for a double crust pie, but for me that meant two dinners.
The first night was ridiculous in it's simplicity, here is the recipe for pastry wrapped barbecued beef.
Preheat the oven to 450° F
Roll one of the flattened dough balls out between two sheets of waxed paper into something like a rectangle, and then pile the pre-made barbecue beef (I used Jack Daniel's Pulled Beef) in the middle and wrap the dough around the meat. Bake for about 30-35 minutes. That was it. I served it with homemade mashed potatoes.
The second night was a little more involved, but that was my choice. The nice thing about pot pie is that you add whatever you happen to have in the house, to the pot. This recipe was made up on the spot, so the ingredient sizes are estimates.
Here are the ingredients used:
4 fresh Baby Potatoes up into small bites, a handful of fresh Broccoli cut up, 1/2 can of peas and carrots, and 2 chicken breasts.
For the chicken take 2 chicken breasts cover them with onion powder, garlic salt, and pepper. Cook them through on the stove, then cut into bite sized pieces. Saute a bit more if not cooked through.
Preheat oven to 450° F
Put the potatoes in a bowl with at least 1/2 TBSP of butter. Cook the potatoes for a few minutes in the microwave to soften them. You can add other vegetables to this bowl if they need softening, too.
Mix all the vegetables together in a big bowl, add some salt and pepper. Add the chicken to the mix.
Add a can of Cream of Chicken Soup to the meat vegetable mix. Add about a cup of milk. Add some water if there is not enough liquid. If you don't mind the calories, add a bit more more butter. Mix it all up.
Split mixture into 4 individual casseroles. Something like this should work.
Mine look more like vegetables, like this
so go with what you have, exact shape and size is not important.
Split the vegetable, meat, sauce mix into each casserole.
Roll out the pastry dough between two sheets of waxed paper into an oval or rectangle shape. Take the top piece of waxed paper off and then cut the dough into fourths. Place each piece of rolled out dough on top of each casserole. Beat an egg if you have one and brush it on the pastry for shine.
Put the casseroles on a baking sheet and bake at 450° F for 30-35 minutes.
Tuesday, December 7, 2010
Pastry Based Dinners
Wednesday, December 1, 2010
LOVE IT SHOW - SEASON 2 EP #2
Culinary Cuties on Sharon Catherine Blanks "Love It List"
This looks very cool. Los Angeles based cooking classes for kids.
http://www.culinarycuties.com/
Tuesday, November 23, 2010
A Gathering of Thanksgiving Posts

It is almost Turkey Day in America. Are you cooking yet? To help out, I've gathered some of our best Thanksgiving posts here.
Advice from Father of Food .
Tuesday, November 16, 2010
A Little Extra Love

A little extra love for my little loves.
Almond Butter and Jelly sandwiches cut into Heart shapes with a cookie cutter.
Grapes quartered, and cut into a heart shape for sandwich accent.
Slice of Cheddar.
Peas with carrots cut into hearts.
Nothing expensive, nothing unusual, just something made with a little extra love.
Sunday, November 14, 2010
The Fever is Spreading


Tuesday, November 9, 2010
Today's Harvest

Monday, November 1, 2010
Roasted Pumpkin Seeds

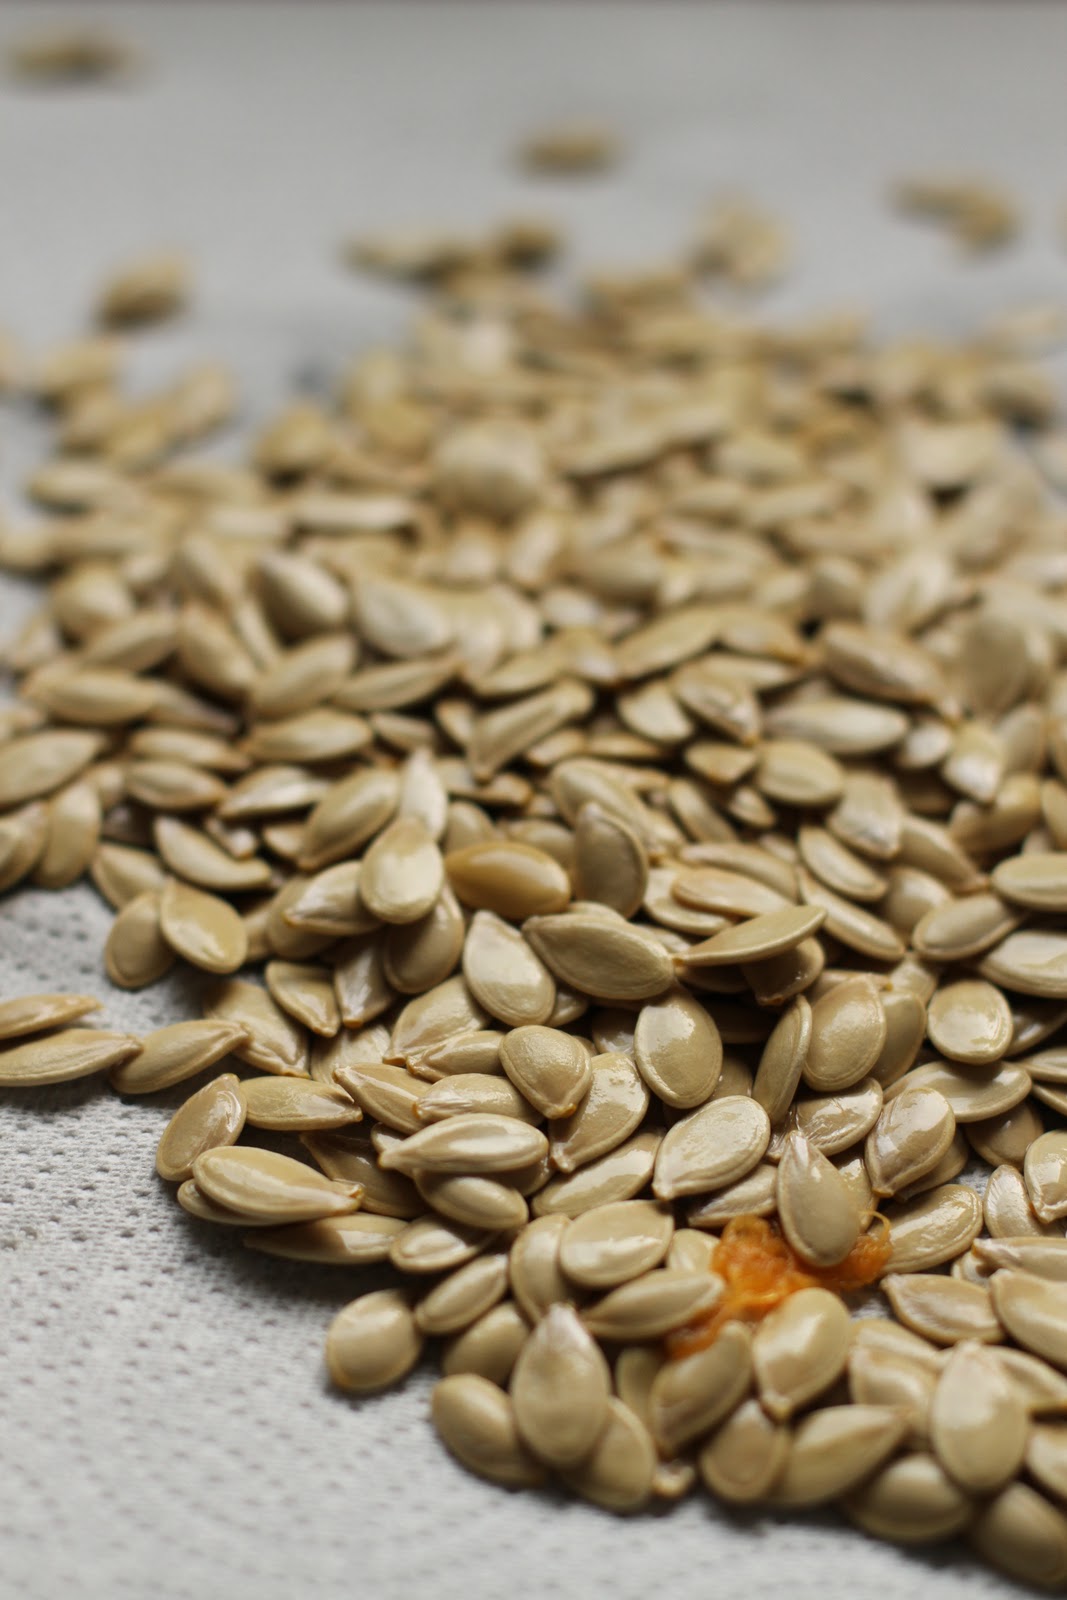


Spread the seeds out on a cookie sheet. Try gently shaking the sheet to spread them evenly.

Sunday, October 31, 2010
Fresh Pumpkin Treats

Cooking the pumpkin
Cool. Scoop out flesh and mash with potato masher or food processor until smooth.
Drain if too watery.
Beat together just until smooth: 1 1/3 Cup smooth pumpkin, 1 1/3 Cup Sweet Condensed Milk, 1 Egg, 1 1/4 tsp Cinnamon, 1/2 tsp Nutmeg, 1/2 tsp Ginger, 1/4 tsp Cloves, 1 Cup hot Water. Pour into 9" pie shell.
Bake at 375 ° F 55 to 65 minutes
(Center will move slightly.) Cool and enjoy.
(Mashed Pumpkin will hold 5 days in refrigerator.)
Here is the Pumpkin Muffin Recipe adapted and adjusted from Better Homes and Gardens New Cook Book (Better Homes &; Gardens Plaid), mine is the 1981 edition
1 3/4 Cups All Purpose Flour
1/3 Cup Sugar
2 tsp Baking Powder
1/2 tsp Salt
1 beaten Egg
1/2 Cup Fresh Cooked Pumpkin (see above)
3/4 Cup Milk
1/3 Cup Cooking Oil
1/2 tsp Ground Cinnamon
1/2 tsp Ground Nutmeg
Preheat oven to 400 ° F
In a large mixing bowl stir together flour, sugar, baking powder, salt, cinnamon, and nutmeg. Make a well in the center. Combine egg, pumpkin, milk, and oil. Add all at once to flour mixture. Stir till just moistened; batter should be lumpy. Grease muffin cup pan or line with paper baking cups. Fill each cup with mixture until 2/3 full. Bake at 400 ° F for 20-25 minutes or until golden. Remove from pan and serve warm.
Pumpkin Chocolate Chip Cookies
We used this recipe from Joy the Baker, and apparently originally from Big Fat Cookies
using fresh cooked pumpkin instead of canned and using mini chocolate chips.
Joy, this is a fantastic recipe. I am quoting it here for my use in the future because I really want to make these again and I will not have it if you ever take your link down.
2 cups all-purpose flour1 1/2 teaspoons baking powder1 teaspoon soda1/2 teaspoon salt1 teaspoon ground cinnamon1/4 teaspoon freshly grated nutmeg1/4 teaspoon ground cloves2 eggs1 cup sugar1/2 cup canola or corn oil1 cup canned pumpkin (or fresh see above)1 teaspoon vanilla extract1 cup chocolate chips, or any chip you like
Position a rack in the middle of the oven . Preheat the oven to 325 degrees F. Line two baking sheets with parchment paper and butter the paper.Stir the flour, baking powder, baking soda, salt and spices together in a medium bowl and set aside. In a large bowl, using an electric mixer on medium speed, beat the eggs and sugar until smooth and lightened in color, about 1 minute. Stop the mixer and scrape the sides of the bowl as needed during mixing. On low speed, mix the oil, pumpkin, and vanilla until blended. Mix in the flour mixture to incorporate it. Mix in the chips.
Using an ice cream scoop with a 1/4-cup capacity, scoop mounds of the dough onto the prepared baking sheets, spacing the cookies at least 2 1/2-inches apart. You could also simply use a 1/4-cup measuring cup if you don’t have a scoop. Use a thin metal spatula to smooth and flatten the rounds.Bake the cookies one sheet at a time until the tops feel firm and a toothpick inserted in the center comes out dry, about 16 minutes. Cool them on the baking sheet for 5 minutes, then use a wide metal spatula to transfer the cookies to a wire rack to cool cimpletely.Dust the cooled cookies lightly with powdered sugar. The cookies can be stored in a tightly covered container at room temperature for up to 4 days.
Roasted Pumpkin Seed recipe coming up next. I have to trick or treat now. Hope you enjoyed these treats.
Monday, October 25, 2010
Chex Mix

This one is for Husband of Food, who is on the other side of the world. Just when my daughter begged to make the recipe which she saw on the back of her cereal box, you are far away.
Home made Chex Mix, it's one of HoF's favorites. Don't worry honey, we'll save you some.
And for the rest of you, here is a link to the official Chex Mix Recipe.
Friday, October 15, 2010
Jim and his Pancakes
More sharing today!
Jim is a Dad and a real pancake genius. He started making pancakes for his daughter, but has elevated it to an art form. I was wowed by his skill with the griddle and the charm of his daughter.
Here are a few of my favorite pancakes. All pictures are Jim's.


Jim's Pancakes
I will also put a permanent link in the Food as Art section of our blog because this is just so cool.
Thursday, October 14, 2010
Two Princesses

Almond Butter and Strawberry Preserve on Wheat Dresses,
decorated with Cheddar Cheese and Apple Slice sashes, Apple Shoulders, and Parsnip Sleeves.
Apple Shoes.
Homemade Muffin Faces with Chocolate Chip Eyes, Apple Smiles, Cheddar Cheese Hair.
All on a bed of sliced Green Grapes.
The Muffin Recipe can be found on the blog at this link here, but for this bento, I didn't add the chips until after the muffins were cooked.
Tuesday, October 12, 2010
Mandi Cakes Link

Sunday, September 26, 2010
Less Spam, More You
There have been improvements in spam blocking on the blog! Friend of the blog, MandiCrocker, noticed that the Blogger comment verifier, wasn't working quite right, especially in combination with programs like Networked Blogs on Facebook. I decided to turn the Blogger visual verifier off for the time being, at the risk of spambots overwhelming the blog. I did get many spam comments sent to me, but they weren't showing up on the blog. Lo and behold, Blogger has added a nifty spam collector in the comments tab of the dashboard. More information on this functionality can be found at http://www.google.com/support/blogger/bin/answer.py?&answer=187141. Good work Google, I am much happier with this approach. Less hassle for readers leaving comments and less spam on the blog. So let us test it out... leave your comment and let us know how it goes. Just make sure it's not spam.
Saturday, September 18, 2010
The Ryback folding santuko knife

Here's the scenario--you're going to someone's house where you're likely to be pressed into service in the kitchen, and you know they don't have a decent knife in the house, but you don't want to be so presumptuous or it's otherwise inconvenient to carry a knife roll. Or maybe you're going away for a weekend where you'll be cooking and you want to travel light. Of course one can always make do with what's there, but maybe there's an alternative--a folding kitchen knife.
I proposed this query to my friends on the eGullet food forum, and we came up with various ideas, but there seem to be three real, full-sized, multi-purpose folding kitchen knives out there, all in the style of the Japanese santuko, a knife of relatively modern design, the name of which means "three virtues"--slicing, dicing, and mincing--as opposed to the more specialized traditional japanese knives like the usuba for slicing vegetables or the long yanagi sashimi slicing knife.
There are some inherent design limitations in a folding kitchen knife. To be practical, the blade will be about 4-5 inches at most, and to fold properly, the handle has to be longer than the blade and the end of the handle has to come about level to the edge of the blade, meaning it must be used at the edge of the cutting board or with a small cutting board, or the end of the handle will hit the board before the knife completes its arc. The long handle also creates a balance problem, since the handle is usually shorter than the blade, and one normally wants the balance point to be around the spot where the heel of the blade meets the handle.
The knives we came up with on eGullet were the A.G. Russell Hocho, the Ryback Folder, and the beautiful Maruyoshi folding santuko. There was one very avid user of the Russell Hocho which is the least expensive of the three at around $65 and is the longest in production, but based on the photos, I liked the design of the other two. One poster bought the Maruyoshi, which has a nice wooden handle and beautiful handmade damascus blade, but it was the most expensive at about $250 from Japan Woodworker in California, and seems more to suit people who like to hold the knife with a pinch grip rather than my preferred hammer grip, which I think is better suited to a knife with a short blade.
I settled on the Ryback folder for about $100 shipped from Germany to the U.S., because I liked the fit and finish based on the photos, and the real article lives up to the photos. It also comes with a handy padded cordura pouch.
The frame lock mechanism, above, is very sturdy, but beware that there is a detente before the knife is fully open, and it is necessary to open the knife fully for the lock to be engaged.
The blade is 1-7/8 inches wide, which is wider than my Wusthof santuko shown above, and 4.5 inches long with about 4-3/8 inches of usable cutting edge. Full length from handle to tip is about 10-3/4 inches. Out of the box the edge is comparable to the factory edge of a decent German knife, but I've come to like a finer edge, so I've made it sharper using my Japanese whetstones.
I've been using the Ryback for everything for a few days, and I've gotten used to the balance, but I still prefer my fixed blade knives given the choice. Watch the video above, though, and think about the last time you made a meal in a vacation condo with whatever dull steak knife they had in the drawer. Wouldn't this have been better? The blade holds a fine edge very nicely, and it's a real, functional kitchen knife that works like a chef's knife or a santuko.
Wednesday, September 15, 2010
Love Bug Bento

They feature:
Open faced turkey sandwiches with Jarlsberg Swiss. The cheese heart was cut with a cookie cutter.
Caterpillars made of celery filled with almond butter and Honey Nut Cheerios.
"Cuties" Mandarin Oranges on the side.
Sunday, September 12, 2010
Southern "Fried" Chicken (Without the Frying)
Tonight I got good reviews on a "fried" chicken recipe that I made at home. Here's a secret, it wasn't really fried. In fact, it was kind of healthy. I built the recipe from one in my Weight Watchers Cookbook. A few substitutions seemed to make this dish tastier than when I made it in the past, so I am archiving it here, for future dinners. Sorry, no pictures; it is in our bellies, now.
Southern Oven "Fried" Chicken
1/2 Cup of Skim Milk
1 tsp Vinegar
3-4 drops of Franks Red Hot Sauce
1/2 cup of Total Cereal
1 TBSP Grated Parmesan Cheese
1 Graham Cracker
3 TBSP All Purpose Flour
1/4 tsp Salt
1/4 tsp Freshly Ground Pepper
1 1/2 to 2 Pounds of Skinless Chicken Breast, sliced into chicken finger sized pieces
4 tsp vegetable oil
Olive Oil Spray
Combine the Milk and Vinegar in a large shallow bowl. Add the Red Hot Sauce and set aside. Do this before anything else so the Milk Mixture has time to curdle.
Preheat oven to 400°F. Spray a large baking sheet with Olive Oil Spray.
Measure 1/2 Total Cereal; then crush it down.
Mix the crushed Total Flakes with the Parmesan Cheese and add Graham Cracker, crushing with a fork to make sure all the lumps are crushed out. Add the flour, salt, and pepper. Mix well.
Dip the Chicken into the Milk Mixture, then dredge through the Crumb Mixture coating each piece well.
Place the coated chicken onto the baking sheet.
Drizzle the 4 tsp of Vegetable Oil onto each piece of chicken. This will help crisp the chicken up in the oven.
Bake for 30 minutes; turn the chicken over and bake for 10-15 minutes more.
This recipe will serve 4 and is around 5 to 6 WW Points per serving.
Tuesday, September 7, 2010
Dance With Me

With all of the food I eat, I need to burn a few calories, and with this workout, I burn more than just a few.
High Cardio exercises are combined with different dance styles to create an addictive workout.
Billy Blanks Jr. and Sharon Catherine Blanks are an inspiration.
Highly recommended!
Thursday, September 2, 2010
Time Keeps on Slippin'

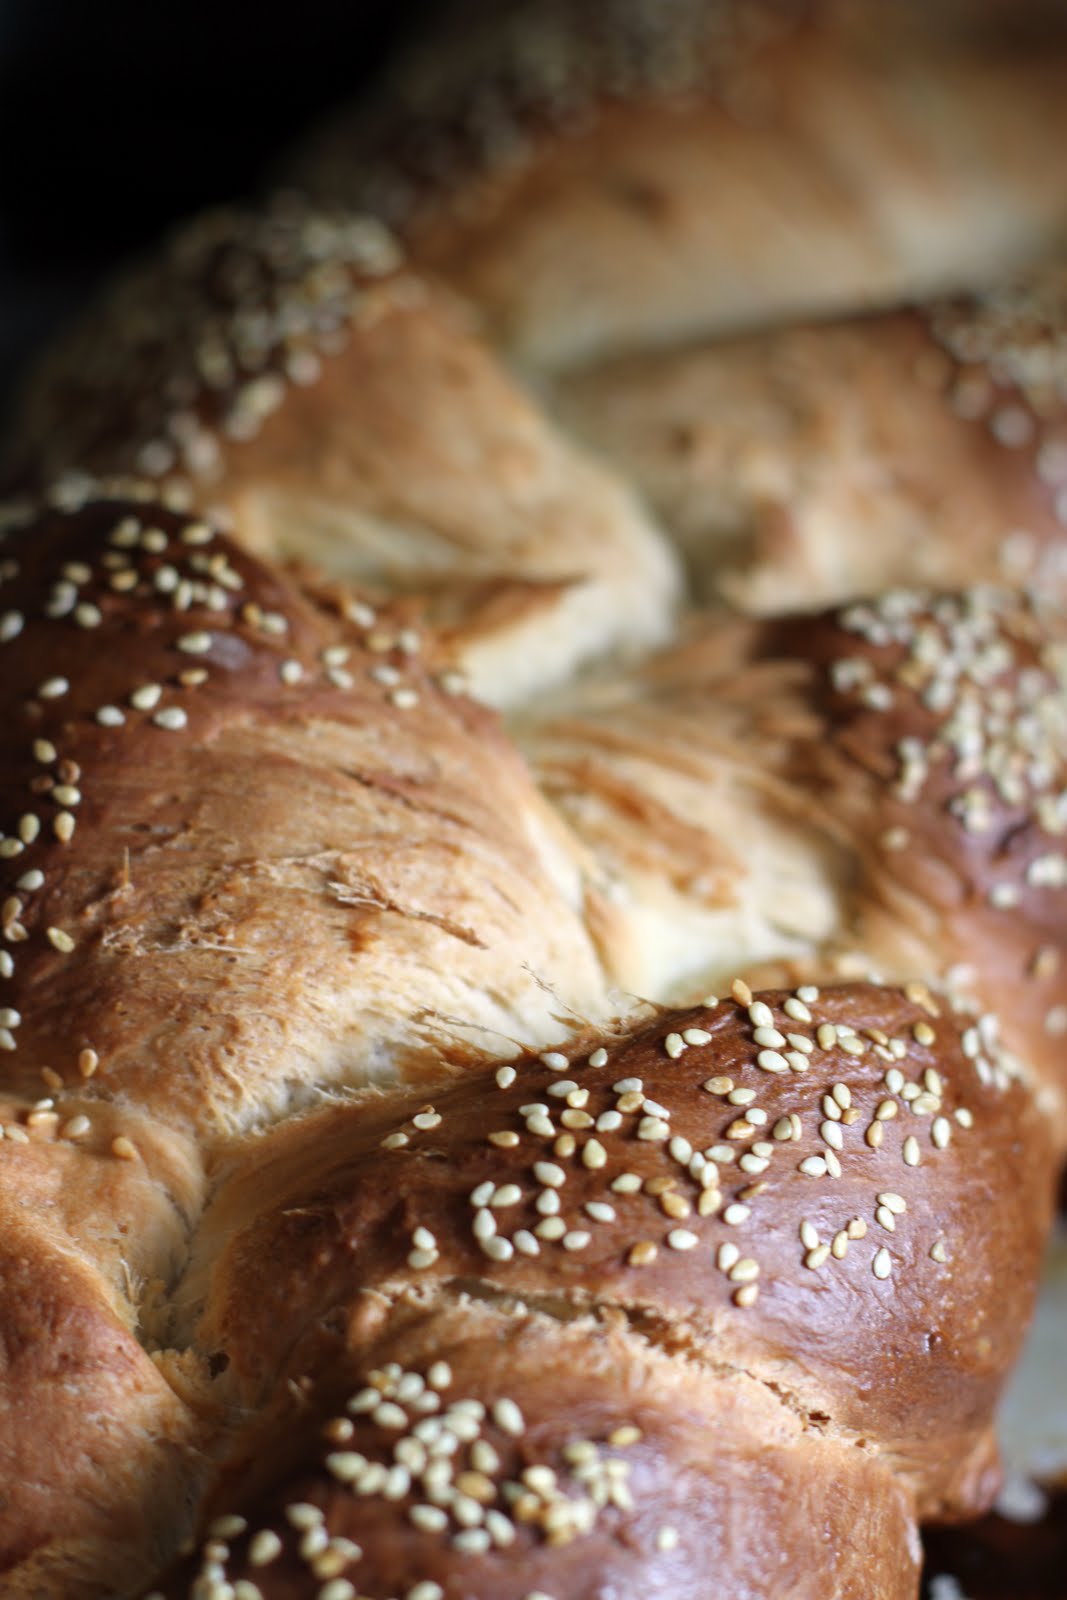
Sunday, August 15, 2010
We give thanks to G-D for Bread


Friday, July 30, 2010
Butterfly Bento

Watermelon sliced
Blueberries
Cucumber sliced
Almond Butter and Strawberry Jam Sandwiches that are shaped like Butterflies
Homemade Blueberry Muffin made from a recipe in The Complete Magnolia Bakery Cookbook, Recipes from the World-Famous Bakery and Allysa Torey's Home Kitchen
Monday, July 5, 2010
Zucchini Fritters
Just had a lovely weekend with Friends of Food, Jen and Kris. To top off all of the incredible hospitality, Jen sent us home with some produce from her food co-op. I couldn't wait to make something of this gift, so tonight's dinner included a peach and plum fruit salad and zucchini fritters. The fritters I found on my favorite Flickr recipe group called Recipes to Share. This recipe was originally posted by Vita Arina at this link.

Drop spoonfuls of the Zucchini Mix into the Frying Pan, trying to keep a circular shape, like dollar pancakes.

Put them on a plate, covering the cooling ones with the latest out of the frying pan to keep the stack warm.
Serve it with Ranch Dressing, or Herb Yogurt Sauce.

Monday, June 14, 2010
More Cookin' & Smokin'
Just an addendum to my post of a few weeks ago on stovetop smoking in the wok. I tried a chicken today--rubbed with a simple rub--salt, fresh crushed garlic, pepper, marjoram, and Indian paprika which is a little hot, but not excessively so--then two hours in the wok with hickory chips. I started it on a medium-high flame and turned it down to medium-low. It was about 170-deg. F when I opened the foil, and then I finished it off under the broiler for about 5 minutes on a side to crisp up the skin, and it's about the closest I've gotten to a grilled flavor indoors.
Saturday, May 29, 2010
L’Atelier de Joël Robuchon (New York)
We went for a first visit tonight, but I suspect we will be returning in the future. I was able to get a reservation Friday night on OpenTable with choices of 5:30 or 6:15 Saturday night, which was a surprise for a prime time at a restaurant of this quality, but I suppose they keep some tables open for hotel guests at The Four Seasons, so they may accommodate late reservations, making this a good option for fine dining without having to plan two to six weeks in advance.
Robuchon's concept is for the diners to sit at a counter around an open kitchen close to the food as it is prepared as in his original Paris restaurant, but there are also tables for guests who may want a more social experience away from the kitchen.
We sat at the counter, which I'd recommend, but don't expect to see that much. There are lots of plants, hanging baskets of fruit, pillars and such that obstruct the view, so you're sitting at the pass of a busy kitchen, but what you see is mainly plating, and not quite enough to figure out too much of what is going on. The presentation is very nicely done, with one or two particularly decorative selections, but not everything is done in that style, so it doesn't come off as overwrought.
It seems the options have been simplified from earlier reports that I had read before going in that we were not offered various sized tasting menus. Instead there is a page of tasting portions, another page with traditional appetizers and mains, the full tasting menu for $190 without wines, and a dessert menu. It is possible to mix and match from the tasting portions, appetizers and main dishes, but we opted for seven tasting portions between us that we shared, plus two desserts, and the server helped us arrange our selections from light to heavy to make for a well paced meal. I thought our server was great, though the busboys were hovering a bit, prodding us along a bit faster than we wanted at first, but they adjusted after the first course or two.
The amuse bouche before the meal was a shot of avocado cream with an intense grapefruit gelée and what I think was a small piece of beef carpaccio on top, which set the tone for the rest of the meal--lots of combinations of savory and creamy cut with citrus.
Now reconstructing from memory and from menus posted on their websites, we started with a Portobello Mushroom Tart, with Eggplant Caviar, Tomato Confit and Arugula and Grilled Squid with what seemed like bacon or jamon and roasted red peppers. The mushroom tart was one of the more graphic presentations with a thin line of balsamic, a small green dot of pesto, and a larger red dot of what may have been a pureed tomato confit, and various other little dots, and it always seems a bit obscure to figure out how to combine these things, so one tastes them separately to guess at what they might be and then dips to taste. It looks great on the plate. The squid is quite wonderful, seared without being overcooked, smokey from the ham, with a hint of the citrus theme cutting through.
Next we had the Seared foie gras and Grapefruit Gratin together with the John Dory Filet with Fava Beans, Chorizo and Sauce Vierge. The foie gras tasted as if it was fried in bacon, conjuring vague reminiscences of rumaki from the '70s, but elevated to something much more subtle, crusty outside and creamy inside, and the grapefruit gratin was a surprising counterbalance. We realized in retrospect that we had too many foie gras dishes, but this one was the most unusual, so for a dish that features foie gras, this would be the keeper. The John Dory was good, but not particularly surprising, which is fine. Not everything needs to be surprising.
Then we continued with Braised Veal Cheek, Thai Jus and Crunchy Vegetables and the Free-Range Caramelised Quail Stuffed with Foie Gras and Potato Purée. Having seen a recipe for the famous potato purée, I couldn't imagine what was really that unusual about it, but the texture really is distinctive--perfectly smooth but not whipped or gummy and with lots and lots of butter to make a kind of a dense paste. I'm guessing they must use a waxy potato to get that texture. In addition to the portion that came with the quail, we received two extra portions served in Staub mini-cocottes, which I think were a bonus. The veal cheek was incredibly soft and the Thai jus a good contrast to the other flavors in the dishes we selected.
The chopped hanger steak and foie gras burgers on brioche buns with fries and house-made ginger ketchup seemed like a good dish to end on, since we'd each get one slider, and this is one of the house standards. Well, it's a very tender burger with a slab of foie gras on top. Do it once to see what all the fuss is about, but the foie gras and grapefruit gratin is more interesting.
We received a pre-dessert amuse, which was another shot glass this time with a raspberry panna cotta and granita, which were well paired--again the figure of a sharp, cold acidic granita against a ground of creamy panna cotta.
Can I say something about the flatware? The spoons are weirdly deep and odd to eat from resembling oversized baby's feeding spoons, and the knives have a symmetrical shape that in a dark restaurant makes it hard to tell which is the cutting edge and which is the spine. My wife couldn't understand at first why she wasn't able to cut through the crust of the mushroom tart.
Desserts were a yuzu souffle with Okinawa sugar ice cream and a coconut dacquoise. The yuzu souffle was really wonderful, yuzu being a flavor that stands up well to the dulling effect of the eggs in a souffle, but I thought a little too large in comparison to the other dishes, which isn't to say we didn't finish it, but it could have been 2/3 the size and would have left us wanting more rather than thinking it was going on too long. I was expecting something that looked like a dacquoise from the dacquoise, but it was a deconstructed/reconstructed version with a dollop of coconut buttercream in a vanilla foam over tapioca with bits of hazelnut (I think) crunch floating in it, and that got me thinking about dacquoise and its connection to this dessert, which isn't an undesirable result.
I had a glass of Alsace riesling and a single espresso, and the bill with tip came to around $325 for two, which I thought was not unreasonable for this level of dining and service. The tasting menu looks wonderful, but eight tasting portions per person would have been way more food than we wanted, and I would only do that if we had planned ahead and not eaten for the rest of the day, but this being a Greenmarket day, we weren't passing up a dozen local oysters on the half shell from Seatuck (he threw in a few extras, so I think we had fifteen actually)--my favorite Long Island fishmonger of late--for a $10 lunch for two.
Saturday, May 22, 2010
Key Lime Disaster of 2010

It all started at the neighborhood market where I got sucked into buying a bag of tiny key limes because they were a dollar. How could I resist? One tiny dollar and I could have about 20-30 limes. What a deal! Except that, unless you are having one heck of a cinco de mayo party, and you are serving cervesas with a lime slice in every bottle, what is there to do with all of these limes? I had already made tequila lime chicken.
Now I was set on making a very simple key lime pie to give a friend who was having us over this afternoon. I had the graham cracker crust all ready pre-made, a can of condensed milk, eggs, and of course the limes with which to make the lime juice. It looked like the recipe required 2 cups of condensed milk, but since one can has only about a cup and a half, I roughly modified the recipe leaving 2 of the 6 egg yolks out and altered the lime juice requirement from 2/3 cup to 1/2 cup.
I needed to get the 1/2 cup of lime juice squeezed out of these tiny fruits with a mini electric hand juicer. I started the process when my 3 year old twins became curious. They wanted to help. I felt this would be a good learning experience and I showed them how to juice. The limes were the hardest fruits I had ever juiced. Being small, they were easy to slip off the rotating reamer and there was very little juice in each tiny lime. That said, with patience, the girls and I had gotten our juice after about a half an hour of hard work. We were on our last limes, when my daughters asked to juice just one more. I cut the last lime and watched as my one twin finished her half. The other twin took her turn at the juicer and I turned to take away some empty peels to the trash. It was then that my daughter pulled a little too hard on the juicer and it toppled off the counter all over her and on to the floor. All of that juicing was lost. It was truly tragic. Tears flowed from the twins as I forced a grin on my face and told the girls that "There is no use crying over spilled lime juice." It was even worse that they thought that they had broken the machine since all of the purposely removable parts came apart in the fall. I had to convince them that the machine was fine. Luckily, I had some limes left. I mopped up the floor, cleaned the surroundings, and then set to work juicing again. The daughter that caused the spill wanted to juice again, but I rejected that proposal at first. Only after realizing that she really needed the chance to prove herself did I put her back to work at the juicer with even more guidance than the last time. My other daughter was playing another game by then and it gave me some good one on one with the twin who needed the Mommy time. We managed to squeeze enough juice out for the recipe with a couple of motley looking left over limes (pictured) to spare. I set my daughter to washing up while I mixed up the rest of the pie.
I put the pie in our well preheated 325 degree oven for 20 minutes, or until the center was almost not jiggling, as the recipe said. It wasn't jiggling, the pie was downright sloshing after 20 minutes, so I put it back in for 10 minutes more. It was still liquid. Now we were pushing our time limits. We had lost at least a half an hour over the lime juice setback and now our friends would be waiting for us. Our friends had an all day movie fun day planned and we did not want to push their schedule back by showing up late. I put the pie in the refrigerator to chill as the recipe said, hoping it would firm up in the cold. As the pie was arriving at the shelf in the fridge a bit spilled over the side and I tasted the drip. It seemed awful sour to me. There was no sugar called for in the recipe. Oh well, I would deal with this later.
After a lovely few hours with friends and family, I came home to discover that the pie had not really firmed up much at all and was indeed sour. I checked the recipe, it called for sweetened condensed milk, had I used sweetened? I checked the recycle bin and for the life of me could not find the word sweetened anywhere on the condensed milk label.
I took out some raw granulated sugar and carefully spooned it into the still liquid pie. I mixed it in until it tasted reasonably sweet and I put it back in the oven for a good half an hour more.

Sunday, May 16, 2010
Cookin' & Smokin'

"While you all been sittin' round laughin' and jokin', we been in the kitchen cookin' & smokin'," Father of Food used to say. Ahh, but while smokin' and grillin' aren't 100% compatible with New York City apartment living, we do have some options. Stovetop smoked meat may not be quite as good as ribs smoked slowly on a grate propped up on two stacks of bricks over a charcoal fire in an oil drum split down its length and set up in a supermarket shopping cart in a parking lot somewhere in downtown Cleveland, but it ain't bad either.
Jill Santopietro did this great video for her New York Times series, Kitchen 4B, showing how to smoke ribs indoors in a wok, and I've tried it a few times now. The basic idea is to line a wok with long pieces of wide aluminum foil leaving plenty of excess hanging over, then put some wood chips in the bottom. I spray the wood chips with a little water for a long slow smoke. The wood chips are covered loosely with another piece of foil to catch the drips from the meat while allowing the smoke to filter up around the foil. Then one or two circular racks are fit in to hold up the food, another piece of foil is tented over the top, and then the loose ends of the two large strips of foil on the bottom are brought back and closed up over the whole package, and a lid is put on top to keep it all in. The heat is turned up on high to get the smoke going, and when you can smell the smoke, turn it down to medium or medium-low. Some things like fish can be smoked quickly in less than half an hour, and some meat can take two or three hours.
This was a thick naturally raised pork chop--about a pound and a half--from Tom Mylan's shop, The Meat Hook in Williamsburg, Brooklyn. I rubbed it with a rub containing about tablespoon of salt, a teaspoon and a half of paprika, a clove of crushed garlic, and smaller amounts of pepper, cayenne, sage, and coriander, let it sit for about half a day (overnight would be even better), then smoked it for two hours in the wok.
Here's what it looks like with the lid off--
While you can smell the smoke, it doesn't fill the apartment with smoke in the way grilling a steak in the grill pan or under the broiler at high temperature might. At the end of two hours I turned off the heat, let the wok sit for a bit, turned on the kitchen fan and opened the foil--
The meat was 160 degrees F and moist--essentially done, but I wanted it softer, so I put it in a 200 F oven for another hour, and then finished it off in a cast iron grill pan under the broiler for a few minutes on each side to get the result visible in the top photo. The meat was tender, smokey, and tasty, just like it should be.
Friday, April 30, 2010
The Bear Pit

Saturday, April 17, 2010
Crab Spring Rolls Test Kitchen

3-4 Green Onions
Napa or Asian Cabbage
Put a wok on the stove to heat up.
Cut the Carrots and Green Onions thin like matchsticks.
Put the Cooked Vegetables into a Large Bowl.

The filling is tasty.
Cut the top off of the Cabbage.
Slice some Cabbage thinly to be stuffed in the wrapper with the Crab Vegetable Mix.
Wraps
Lay out a Spring Roll Wrapper like a diamond.
Put a couple of spoonfuls of Filling on the Wrapper.


Add 1 part Chili Paste to 2 parts Soy Sauce and Honey to a small bowl.
This sauce was way to spicy for my tastes with equal part ingredients. Even this mix was a bit hot, but you only need a drizzle on the Spring Rolls.
Mix and adjust to your taste, making sure it is liquid enough to drizzle on your Spring Rolls.
Finishing
Take the Rolls out of the oven.
This was as far as I got. If you want to get fancy, do the next step...
Lay out some Mushrooms on a plate.
Slice the rolls on a diagonal.
Put the rolls on the mushroom plate.
Drizzle Sauce on top and around the plate.


