
Early this week I made two pastry based dinners and let's just say they worked out. No leftovers. Couldn't even get a pic. One was a pastry wrapped shredded barbecue beef, the other dish was chicken pot pie in individual casseroles. Here's the great thing... they were both deceptively easy to make.
I made the pastry from a Kitchen Aid recipe and once that was done, the rest was easy as pie.
Here is the recipe for the Kitchenaid Pie Pastry:
Makes 2 crusts
2 1/4 cup of all purpose flour
3/4 tsp salt
1/2 cup shortening, well chilled
2 TBSP butter or margarine, well chilled
5-6 TBSP cold water
Place flour and salt in mixer bowl. Attach bowl and flat beater to the mixer. Turn to stir speed and mix about 15 seconds. Cut shortening and butter into pieces and add to flour mixture. Turn to stir speed and mix until shortening pieces are the size of small peas, 30-45 seconds.
Continuing on stir speed, add water 1 TBSP at a time, mixing until ingredients are moistened and dough begins to hold together. Divide dough in half. Pat each half into a smooth ball and flatten slightly. Put in a ziplock or wrap in plastic wrap. Chill in refrigerator for at least 15 minutes.
In the recipe, the dough was split for a double crust pie, but for me that meant two dinners.
The first night was ridiculous in it's simplicity, here is the recipe for pastry wrapped barbecued beef.
Preheat the oven to 450° F
Roll one of the flattened dough balls out between two sheets of waxed paper into something like a rectangle, and then pile the pre-made barbecue beef (I used Jack Daniel's Pulled Beef) in the middle and wrap the dough around the meat. Bake for about 30-35 minutes. That was it. I served it with homemade mashed potatoes.
The second night was a little more involved, but that was my choice. The nice thing about pot pie is that you add whatever you happen to have in the house, to the pot. This recipe was made up on the spot, so the ingredient sizes are estimates.
Here are the ingredients used:
4 fresh Baby Potatoes up into small bites, a handful of fresh Broccoli cut up, 1/2 can of peas and carrots, and 2 chicken breasts.
For the chicken take 2 chicken breasts cover them with onion powder, garlic salt, and pepper. Cook them through on the stove, then cut into bite sized pieces. Saute a bit more if not cooked through.
Preheat oven to 450° F
Put the potatoes in a bowl with at least 1/2 TBSP of butter. Cook the potatoes for a few minutes in the microwave to soften them. You can add other vegetables to this bowl if they need softening, too.
Mix all the vegetables together in a big bowl, add some salt and pepper. Add the chicken to the mix.
Add a can of Cream of Chicken Soup to the meat vegetable mix. Add about a cup of milk. Add some water if there is not enough liquid. If you don't mind the calories, add a bit more more butter. Mix it all up.
Split mixture into 4 individual casseroles. Something like this should work.
Mine look more like vegetables, like this
so go with what you have, exact shape and size is not important.
Split the vegetable, meat, sauce mix into each casserole.
Roll out the pastry dough between two sheets of waxed paper into an oval or rectangle shape. Take the top piece of waxed paper off and then cut the dough into fourths. Place each piece of rolled out dough on top of each casserole. Beat an egg if you have one and brush it on the pastry for shine.
Put the casseroles on a baking sheet and bake at 450° F for 30-35 minutes.
Tuesday, December 7, 2010
Pastry Based Dinners

Wednesday, December 1, 2010
LOVE IT SHOW - SEASON 2 EP #2
Culinary Cuties on Sharon Catherine Blanks "Love It List"
This looks very cool. Los Angeles based cooking classes for kids.
http://www.culinarycuties.com/
Tuesday, November 23, 2010
A Gathering of Thanksgiving Posts

It is almost Turkey Day in America. Are you cooking yet? To help out, I've gathered some of our best Thanksgiving posts here.
Thanksgiving - Common problems, Simple Solutions
Advice from Father of Food .
Advice from Father of Food .
How to use a Whipper like this Isi Thermowhip.
A tiny recipe.
Tuesday, November 16, 2010
A Little Extra Love

A little extra love for my little loves.
Almond Butter and Jelly sandwiches cut into Heart shapes with a cookie cutter.
Grapes quartered, and cut into a heart shape for sandwich accent.
Slice of Cheddar.
Peas with carrots cut into hearts.
Nothing expensive, nothing unusual, just something made with a little extra love.
Sunday, November 14, 2010
The Fever is Spreading

Today I went to a birthday party for young Friend of Food's Daughter (Friend of Food once removed?) and just look at the loving care put into these cat themed goodies. Friend of Food's Mom made these treats.
For the kids, peanut butter and jelly Cat Sandwiches, with raisins for eyes, pretzel sticks for whiskers, and grape tomato noses.

For everyone, there were chocolate Cat Cupcakes frosted in purple (the Birthday Girl's favorite color) with M&M eyes, marshmallow teeth, licorice whiskers, raisin noses, and tart gummy candy ears. There was a secret surprise, the paper cups were Hello Kitty, so there was a cat at the bottom of the cup cake.
Nicely done, Friend of Food's Mom. It seems the fever for making iconic foods is spreading, maybe in this case it is a cat scratch fever?
Tuesday, November 9, 2010
Today's Harvest

Today's Harvest: Persimmons, Apples, and Peppers.
I might make some applesauce, dried persimmons,
and turkey chili with green peppers.
Anyone have any better suggestions?
Leave recipe ideas in the comments.
Monday, November 1, 2010
Roasted Pumpkin Seeds
Got a pumpkin left uncarved? Dig in and get those seeds out.

Wash the seeds thoroughly.
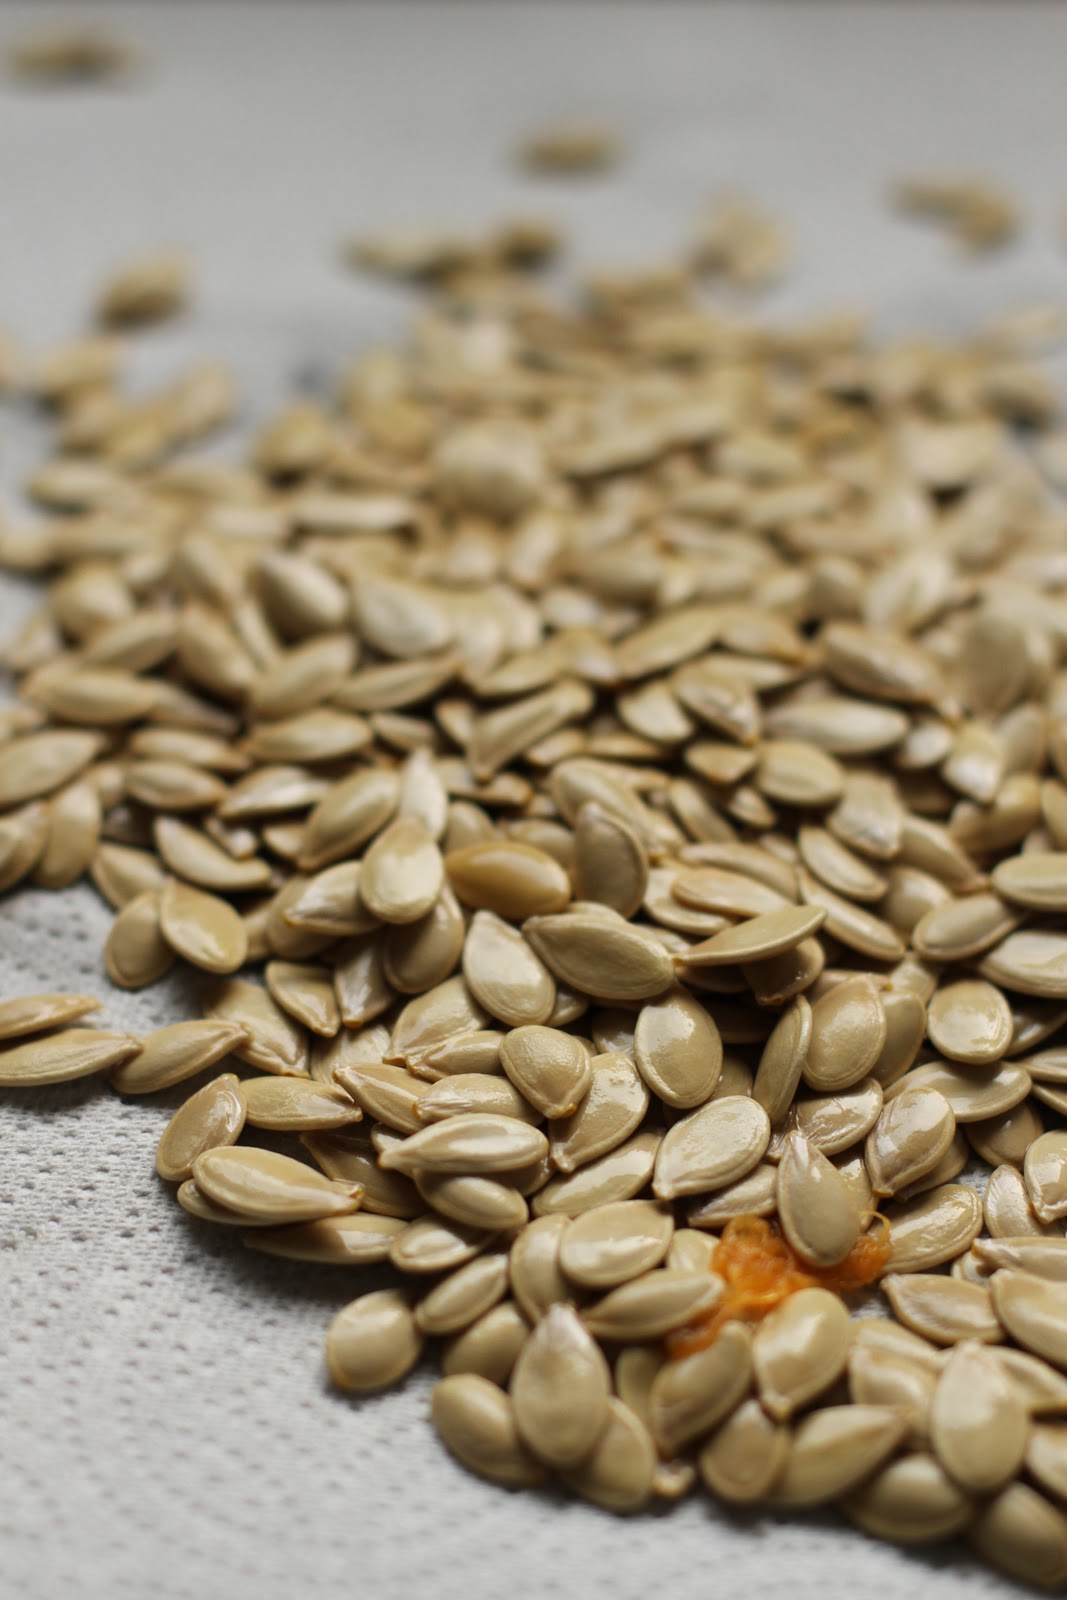
Dry the seeds on a paper towel.

Mix the seeds with melted 1 TBSP of butter and 1/4 tsp salt.
Optional: add 1/2 tsp of chili powder, garlic powder, or wasabi powder for some extra spice.

Spread the seeds out on a cookie sheet. Try gently shaking the sheet to spread them evenly.
Bake in a 350 ° F oven for 30 minutes turning the seeds over once or twice while they cook to get an even roast.

Enjoy!
Sunday, October 31, 2010
Fresh Pumpkin Treats

Mother in Law of Food brought two pie pumpkins by for Halloween. The girls wanted to carve them, but we all also wanted to cook them for pie and cookies. Let me tell you this. You can cook a pumpkin or you can carve a pumpkin, you really don't want to do both. The good thing is that they are really easy to carve after cooking for an hour and a half, the bad thing is that they are not so structurally sound.
Cooked Pumpkins do yield terrific mashed pumpkin for pies, cookies, and muffins. We know because made them all! We made all that and yummy roasted pumpkin seeds for snacking. The pie was OK, but could have used a little more sugar, the muffins went fast and were solid, the pumpkin cookies with chocolate chips were fantastic.
Here is the pumpkin pie recipe, straight from a sticker on the pumpkins:
Cooking the pumpkin
Cut Pumpkin in half w/o stem.
Scoop out seeds and Strings (set seeds aside for roasting later).
Place cut down on foil lined baking sheets. Cover with foil.
Bake at 350 ° F 'til tender - 1&1/2 hours. Cool. Scoop out flesh and mash with potato masher or food processor until smooth.
Drain if too watery.
Beat together just until smooth: 1 1/3 Cup smooth pumpkin, 1 1/3 Cup Sweet Condensed Milk, 1 Egg, 1 1/4 tsp Cinnamon, 1/2 tsp Nutmeg, 1/2 tsp Ginger, 1/4 tsp Cloves, 1 Cup hot Water. Pour into 9" pie shell.
Bake at 375 ° F 55 to 65 minutes
(Center will move slightly.) Cool and enjoy.
(Mashed Pumpkin will hold 5 days in refrigerator.)
Here is the Pumpkin Muffin Recipe adapted and adjusted from Better Homes and Gardens New Cook Book (Better Homes &; Gardens Plaid), mine is the 1981 edition
 and the original recipe can be found on page 87:
1 3/4 Cups All Purpose Flour
1/3 Cup Sugar
2 tsp Baking Powder
1/2 tsp Salt
1 beaten Egg
1/2 Cup Fresh Cooked Pumpkin (see above)
3/4 Cup Milk
1/3 Cup Cooking Oil
1/2 tsp Ground Cinnamon
1/2 tsp Ground Nutmeg
Preheat oven to 400 ° F
In a large mixing bowl stir together flour, sugar, baking powder, salt, cinnamon, and nutmeg. Make a well in the center. Combine egg, pumpkin, milk, and oil. Add all at once to flour mixture. Stir till just moistened; batter should be lumpy. Grease muffin cup pan or line with paper baking cups. Fill each cup with mixture until 2/3 full. Bake at 400 ° F for 20-25 minutes or until golden. Remove from pan and serve warm.
Pumpkin Chocolate Chip Cookies
We used this recipe from Joy the Baker, and apparently originally from Big Fat Cookies

using fresh cooked pumpkin instead of canned and using mini chocolate chips.
Joy, this is a fantastic recipe. I am quoting it here for my use in the future because I really want to make these again and I will not have it if you ever take your link down.
2 cups all-purpose flour1 1/2 teaspoons baking powder1 teaspoon soda1/2 teaspoon salt1 teaspoon ground cinnamon1/4 teaspoon freshly grated nutmeg1/4 teaspoon ground cloves2 eggs1 cup sugar1/2 cup canola or corn oil1 cup canned pumpkin (or fresh see above)1 teaspoon vanilla extract1 cup chocolate chips, or any chip you like
Position a rack in the middle of the oven . Preheat the oven to 325 degrees F. Line two baking sheets with parchment paper and butter the paper.Stir the flour, baking powder, baking soda, salt and spices together in a medium bowl and set aside. In a large bowl, using an electric mixer on medium speed, beat the eggs and sugar until smooth and lightened in color, about 1 minute. Stop the mixer and scrape the sides of the bowl as needed during mixing. On low speed, mix the oil, pumpkin, and vanilla until blended. Mix in the flour mixture to incorporate it. Mix in the chips.
Using an ice cream scoop with a 1/4-cup capacity, scoop mounds of the dough onto the prepared baking sheets, spacing the cookies at least 2 1/2-inches apart. You could also simply use a 1/4-cup measuring cup if you don’t have a scoop. Use a thin metal spatula to smooth and flatten the rounds.Bake the cookies one sheet at a time until the tops feel firm and a toothpick inserted in the center comes out dry, about 16 minutes. Cool them on the baking sheet for 5 minutes, then use a wide metal spatula to transfer the cookies to a wire rack to cool cimpletely.Dust the cooled cookies lightly with powdered sugar. The cookies can be stored in a tightly covered container at room temperature for up to 4 days.
Roasted Pumpkin Seed recipe coming up next. I have to trick or treat now. Hope you enjoyed these treats.
Subscribe to:
Posts (Atom)





