Thursday, September 2, 2010

Time Keeps on Slippin'


Am I feeling patriotic?  Am I strangely inspired by Steve Miller?  Am I a huge Stephen Colbert fan?
All of those things are true, but that is not why I made these Eagle bento boxes.
My little babies are growing up and they have graduated into their new Eagles classroom at Preschool.
On their first day I made these boxes.

Almond butter and jelly on french bread for the head.
A thinly sliced baby carrot and green bean for the eye.
String cheese for the neck feathers.
Pretzel sticks for the body feathers.
Cantaloupe for the Beak.

Now they're ready to fly like eagles; to fly right into the future.

Sunday, August 15, 2010

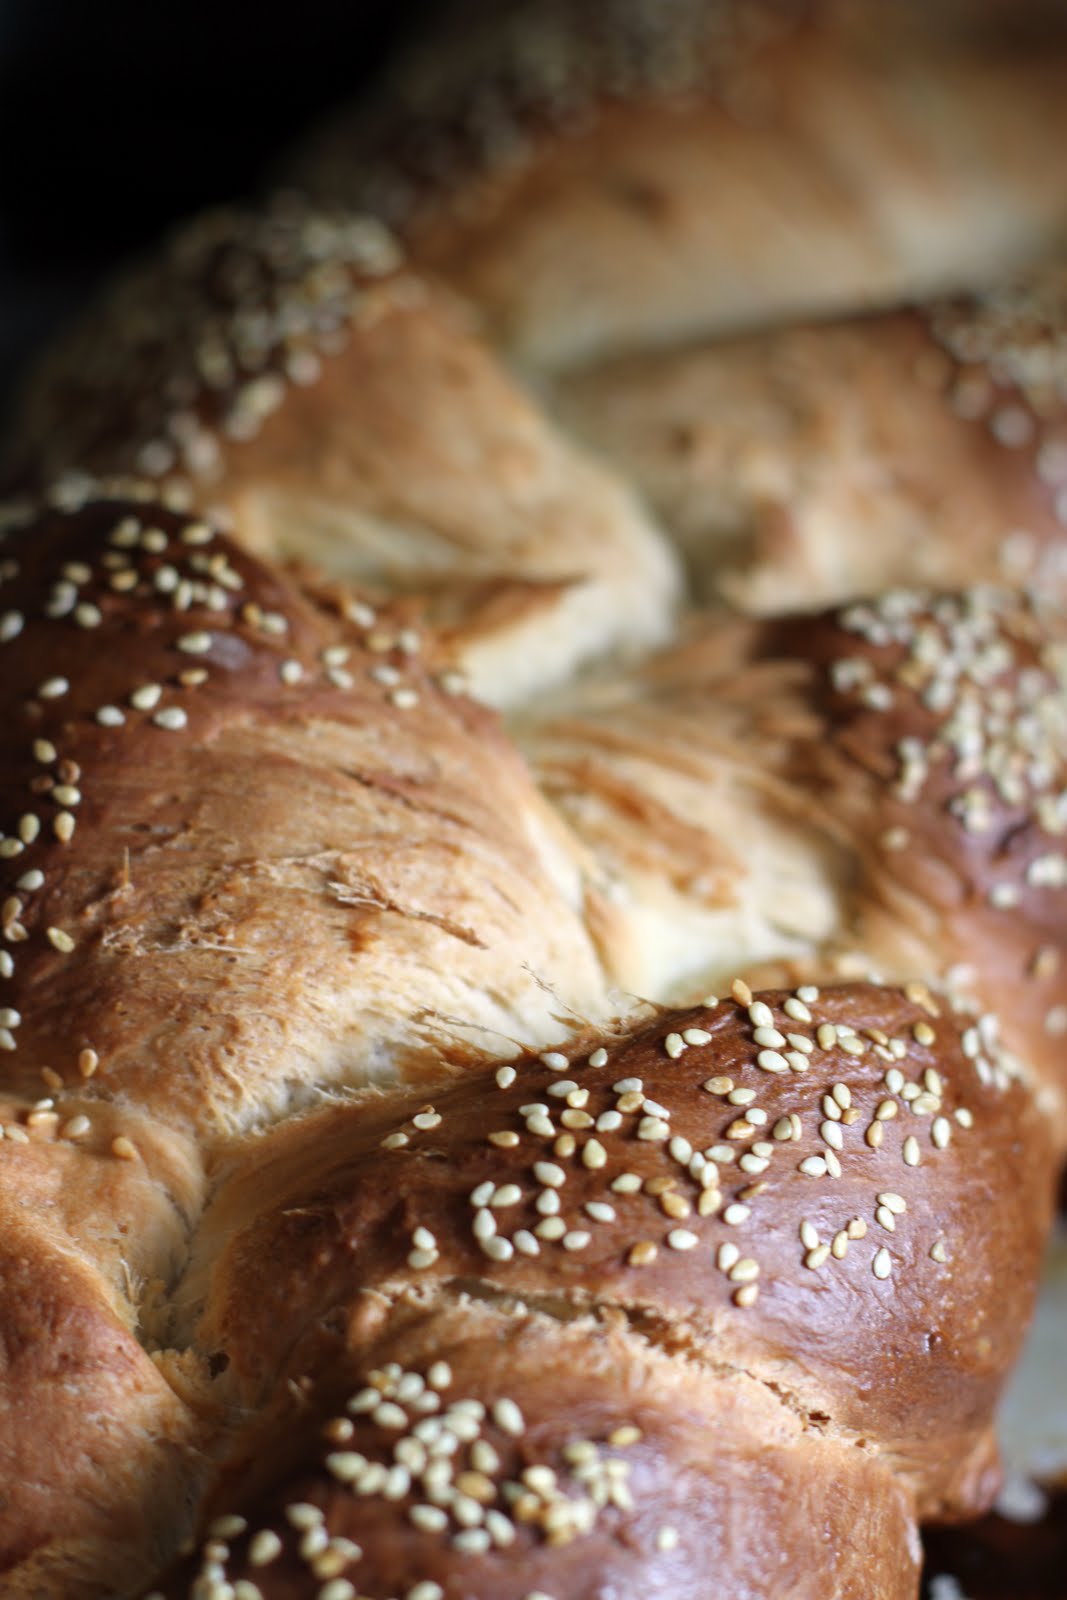
We give thanks to G-D for Bread


One of the true gifts that G-D has bestowed upon the Jewish People is Challah.  With one crunch into the egg polished crust, the tongue lingering on the seeds before the teeth tear their way through the flaky light strands inside, a true believer is born. 


A slightly salty, yeasty aftertaste lingers, an almost buttery sensation, though no butter is used in Challah. 


A prayer is said. 
Baruch atah Adonai, Elloheinu Melech haolam hamotzi lechem meen haaretz, amen. 
I believe in Challah. 

A rich and complex taste for a bread, Challah is more simple to make than it seems.  My kindergarten class would make a couple of loaves every Friday.  It has been years since I made a Challah.  Today I showed my girls how the bread is braided. 


CHALLAH

6 Cups All Purpose Flour
2 packets of yeast or 4 1/2 tsp
1/4 Cup Sugar
Lukewarm Water
3 Eggs Beaten
1 Egg Yolk
1/3 Cup Vegetable Oil
1TBSP Salt
Sesame or Poppy Seeds (optional)

Sift flour into a large bowl, or Kitchen Aid Mixing Bowl.
Make a well in the flour and add the yeast.
Add the Sugar and 1/2 Cup of Lukewarm Water to the well.
Let stand for 10 minutes.
Mix in Eggs, Oil, and Salt and 1 more cup of Water
If Flour is dry, add a little more water, but not too much.
Kneed the dough with your hands or a dough hook if you are using the Kitchen Aid.
Make sure to work in the dough that collects on the sides of the bowl.
Knead until the dough is smooth and elastic, only a few minutes in the Kitchen Aid, but up to 15 minutes by hand.
Cover the bowl with a warm wet paper towel or clean cloth towel.
Let rise 45 min - 1 hour
Punch the dough down.

Put the dough onto a large floured surface.
Divide into 3 even pieces.
Roll each piece into a long rope of dough.
Pinch the three pieces together at the top and begin to braid.
Bring the outside rope to the middle and then the opposite outside rope into the middle until the braid is complete. 
Pinch the end together and tuck under.

Grease and lightly flour a cookie sheet.
Move the braided dough to the sheet.
Cover the dough and let rise until light.
Preheat the oven to 400 degrees.
Beat the Egg Yolk with a tsp of water and brush on to the outside of the dough with a pastry brush.
Sprinke Seeds on the bread.

Bake for 45 minutes at 400°F
Reduce heat to 325°F and bake for 15 more minutes.


Friday, July 30, 2010

Butterfly Bento

Here are today's bento for my two little butterflies. 
Watermelon sliced
Blueberries
Cucumber sliced
Almond Butter and Strawberry Jam Sandwiches that are shaped like Butterflies
Homemade Blueberry Muffin made from a recipe in The Complete Magnolia Bakery Cookbook, Recipes from the World-Famous Bakery and Allysa Torey's Home Kitchen


Monday, July 5, 2010

Zucchini Fritters

Just had a lovely weekend with Friends of Food, Jen and Kris.  To top off all of the incredible hospitality, Jen sent us home with some produce from her food co-op.  I couldn't wait to make something of this gift, so  tonight's dinner included a peach and plum fruit salad and zucchini fritters.  The fritters I found on my favorite Flickr recipe group called Recipes to Share. This recipe was originally posted by Vita Arina at this link

I am going to expand upon it a bit here because I want to share it with Jen and other busy cooks who might be looking for a simple zucchini dish to cook up in a short amount of time.

Zucchini Fritters

Grate 1 Zucchini into a large bowl.

Press any excess liquid out of it with a paper towel.

Into this bowl, mix:
2 large eggs
8-9 tablespoons all-purpose flour,
2/3 cup plain yogurt,
1 TBSP Parmesan cheese
Salt and Freshly Ground Black Pepper to taste.


Heat 1-2 TBSP of Olive Oil in a large frying pan.

Drop spoonfuls of the Zucchini Mix into the Frying Pan, trying to keep a circular shape, like dollar pancakes.


When the edges start to brown, flip the fritters.  Continue to fry up like pancakes.

Put them on a plate, covering the cooling ones with the latest out of the frying pan to keep the stack warm.

Serve it with Ranch Dressing, or Herb Yogurt Sauce.

Monday, June 14, 2010

More Cookin' & Smokin'

Just an addendum to my post of a few weeks ago on stovetop smoking in the wok. I tried a chicken today--rubbed with a simple rub--salt, fresh crushed garlic, pepper, marjoram, and Indian paprika which is a little hot, but not excessively so--then two hours in the wok with hickory chips. I started it on a medium-high flame and turned it down to medium-low. It was about 170-deg. F when I opened the foil, and then I finished it off under the broiler for about 5 minutes on a side to crisp up the skin, and it's about the closest I've gotten to a grilled flavor indoors.

Saturday, May 29, 2010

L’Atelier de Joël Robuchon (New York)

We went for a first visit tonight, but I suspect we will be returning in the future. I was able to get a reservation Friday night on OpenTable with choices of 5:30 or 6:15 Saturday night, which was a surprise for a prime time at a restaurant of this quality, but I suppose they keep some tables open for hotel guests at The Four Seasons, so they may accommodate late reservations, making this a good option for fine dining without having to plan two to six weeks in advance.

Robuchon's concept is for the diners to sit at a counter around an open kitchen close to the food as it is prepared as in his original Paris restaurant, but there are also tables for guests who may want a more social experience away from the kitchen.

We sat at the counter, which I'd recommend, but don't expect to see that much. There are lots of plants, hanging baskets of fruit, pillars and such that obstruct the view, so you're sitting at the pass of a busy kitchen, but what you see is mainly plating, and not quite enough to figure out too much of what is going on. The presentation is very nicely done, with one or two particularly decorative selections, but not everything is done in that style, so it doesn't come off as overwrought.

It seems the options have been simplified from earlier reports that I had read before going in that we were not offered various sized tasting menus. Instead there is a page of tasting portions, another page with traditional appetizers and mains, the full tasting menu for $190 without wines, and a dessert menu. It is possible to mix and match from the tasting portions, appetizers and main dishes, but we opted for seven tasting portions between us that we shared, plus two desserts, and the server helped us arrange our selections from light to heavy to make for a well paced meal. I thought our server was great, though the busboys were hovering a bit, prodding us along a bit faster than we wanted at first, but they adjusted after the first course or two.

The amuse bouche before the meal was a shot of avocado cream with an intense grapefruit gelée and what I think was a small piece of beef carpaccio on top, which set the tone for the rest of the meal--lots of combinations of savory and creamy cut with citrus.

Now reconstructing from memory and from menus posted on their websites, we started with a Portobello Mushroom Tart, with Eggplant Caviar, Tomato Confit and Arugula and Grilled Squid with what seemed like bacon or jamon and roasted red peppers. The mushroom tart was one of the more graphic presentations with a thin line of balsamic, a small green dot of pesto, and a larger red dot of what may have been a pureed tomato confit, and various other little dots, and it always seems a bit obscure to figure out how to combine these things, so one tastes them separately to guess at what they might be and then dips to taste. It looks great on the plate. The squid is quite wonderful, seared without being overcooked, smokey from the ham, with a hint of the citrus theme cutting through.

Next we had the Seared foie gras and Grapefruit Gratin together with the John Dory Filet with Fava Beans, Chorizo and Sauce Vierge. The foie gras tasted as if it was fried in bacon, conjuring vague reminiscences of rumaki from the '70s, but elevated to something much more subtle, crusty outside and creamy inside, and the grapefruit gratin was a surprising counterbalance. We realized in retrospect that we had too many foie gras dishes, but this one was the most unusual, so for a dish that features foie gras, this would be the keeper. The John Dory was good, but not particularly surprising, which is fine. Not everything needs to be surprising.

Then we continued with Braised Veal Cheek, Thai Jus and Crunchy Vegetables and the Free-Range Caramelised Quail Stuffed with Foie Gras and Potato Purée. Having seen a recipe for the famous potato purée, I couldn't imagine what was really that unusual about it, but the texture really is distinctive--perfectly smooth but not whipped or gummy and with lots and lots of butter to make a kind of a dense paste. I'm guessing they must use a waxy potato to get that texture. In addition to the portion that came with the quail, we received two extra portions served in Staub mini-cocottes, which I think were a bonus. The veal cheek was incredibly soft and the Thai jus a good contrast to the other flavors in the dishes we selected.

The chopped hanger steak and foie gras burgers on brioche buns with fries and house-made ginger ketchup seemed like a good dish to end on, since we'd each get one slider, and this is one of the house standards. Well, it's a very tender burger with a slab of foie gras on top. Do it once to see what all the fuss is about, but the foie gras and grapefruit gratin is more interesting.

We received a pre-dessert amuse, which was another shot glass this time with a raspberry panna cotta and granita, which were well paired--again the figure of a sharp, cold acidic granita against a ground of creamy panna cotta.

Can I say something about the flatware? The spoons are weirdly deep and odd to eat from resembling oversized baby's feeding spoons, and the knives have a symmetrical shape that in a dark restaurant makes it hard to tell which is the cutting edge and which is the spine. My wife couldn't understand at first why she wasn't able to cut through the crust of the mushroom tart.

Desserts were a yuzu souffle with Okinawa sugar ice cream and a coconut dacquoise. The yuzu souffle was really wonderful, yuzu being a flavor that stands up well to the dulling effect of the eggs in a souffle, but I thought a little too large in comparison to the other dishes, which isn't to say we didn't finish it, but it could have been 2/3 the size and would have left us wanting more rather than thinking it was going on too long. I was expecting something that looked like a dacquoise from the dacquoise, but it was a deconstructed/reconstructed version with a dollop of coconut buttercream in a vanilla foam over tapioca with bits of hazelnut (I think) crunch floating in it, and that got me thinking about dacquoise and its connection to this dessert, which isn't an undesirable result.

I had a glass of Alsace riesling and a single espresso, and the bill with tip came to around $325 for two, which I thought was not unreasonable for this level of dining and service. The tasting menu looks wonderful, but eight tasting portions per person would have been way more food than we wanted, and I would only do that if we had planned ahead and not eaten for the rest of the day, but this being a Greenmarket day, we weren't passing up a dozen local oysters on the half shell from Seatuck (he threw in a few extras, so I think we had fifteen actually)--my favorite Long Island fishmonger of late--for a $10 lunch for two.

Saturday, May 22, 2010

Key Lime Disaster of 2010

Holy Moly, am I trying to fix a pie disaster.  Oh No, I am not one of those perfect foodie mavens who only gives you the food porn pretty pictures and the Martha Stewart recipes.  I give you the good the bad and the ugly.  This one is trending towards bad and ugly.

It all started at the neighborhood market where I got sucked into buying a bag of tiny key limes because they were a dollar.  How could I resist?  One tiny dollar and I could have about 20-30 limes.  What a deal!  Except that, unless you are having one heck of a cinco de mayo party, and you are serving cervesas with a lime slice in every bottle, what is there to do with all of these limes?  I had already made tequila lime chicken.

Now I was set on making a very simple key lime pie to give a friend who was having us over this afternoon.  I had the graham cracker crust all ready pre-made, a can of condensed milk, eggs, and of course the limes with which to make the lime juice.  It looked like the recipe required 2 cups of condensed milk, but since one can has only about a cup and a half, I roughly modified the recipe leaving 2 of the 6 egg yolks out and altered the lime juice requirement from 2/3 cup to 1/2 cup.

I needed to get the 1/2 cup of lime juice squeezed out of these tiny fruits with a mini electric hand juicer.  I started the process when my 3 year old twins became curious.  They wanted to help.  I felt this would be a good learning experience and I showed them how to juice.  The limes were the hardest fruits I had ever juiced.  Being small, they were easy to slip off the rotating reamer and there was very little juice in each tiny lime.  That said, with patience, the girls and I had gotten our juice after about a half an hour of hard work.  We were on our last limes, when my daughters asked to juice just one more.  I cut the last lime and watched as my one twin finished her half.  The other twin took her turn at the juicer and I turned to take away some empty peels to the trash.  It was then that my daughter pulled a little too hard on the juicer and it toppled off the counter all over her and on to the floor.  All of that juicing was lost.  It was truly tragic.  Tears flowed from the twins as I forced a grin on my face and told the girls that "There is no use crying over spilled lime juice."  It was even worse that they thought that they had broken the machine since all of the purposely removable parts came apart in the fall.  I had to convince them that the machine was fine.  Luckily, I had some limes left.  I mopped up the floor, cleaned the surroundings, and then set to work juicing again.  The daughter that caused the spill wanted to juice again, but I rejected that proposal at first.  Only after realizing that she really needed the chance to prove herself did I put her back to work at the juicer with even more guidance than the last time.  My other daughter was playing another game by then and it gave me some good one on one with the twin who needed the Mommy time.  We managed to squeeze enough juice out for the recipe with a couple of motley looking left over limes (pictured) to spare.  I set my daughter to washing up while I mixed up the rest of the pie. 

I put the pie in our well preheated 325 degree oven for 20 minutes, or until the center was almost not jiggling, as the recipe said.  It wasn't jiggling, the pie was downright sloshing after 20 minutes, so I put it back in for 10 minutes more.  It was still liquid. Now we were pushing our time limits.  We had lost at least a half an hour over the lime juice setback and now our friends would be waiting for us.  Our friends had an all day movie fun day planned and we did not want to push their schedule back by showing up late.  I put the pie in the refrigerator to chill as the recipe said, hoping it would firm up in the cold.  As the pie was arriving at the shelf in the fridge a bit spilled over the side and I tasted the drip.  It seemed awful sour to me.  There was no sugar called for in the recipe.  Oh well, I would deal with this later.

After a lovely few hours with friends and family, I came home to discover that the pie had not really firmed up much at all and was indeed sour.  I checked the recipe, it called for sweetened condensed milk, had I used sweetened?  I checked the recycle bin and for the life of me could not find the word sweetened anywhere on the condensed milk label.

I took out some raw granulated sugar and carefully spooned it into the still liquid pie.  I mixed it in until it tasted reasonably sweet and I put it back in the oven for a good half an hour more. 

This is what it looked like after cooling for a few minutes.  Notice the part on the pan where the filling dripped over the side.  You see, I tell it all.  The three sad looking lime slices were garnish that sunk during my "careful" sugar stirring.  Like I said, trending towards ugly. Now we will see if it also trends toward bad.  The pie is chilling in the fridge and will be tasted after dinner tonight. 

Sunday, May 16, 2010

Cookin' & Smokin'


"While you all been sittin' round laughin' and jokin', we been in the kitchen cookin' & smokin'," Father of Food used to say. Ahh, but while smokin' and grillin' aren't 100% compatible with New York City apartment living, we do have some options. Stovetop smoked meat may not be quite as good as ribs smoked slowly on a grate propped up on two stacks of bricks over a charcoal fire in an oil drum split down its length and set up in a supermarket shopping cart in a parking lot somewhere in downtown Cleveland, but it ain't bad either.

Jill Santopietro did this great video for her New York Times series, Kitchen 4B, showing how to smoke ribs indoors in a wok, and I've tried it a few times now. The basic idea is to line a wok with long pieces of wide aluminum foil leaving plenty of excess hanging over, then put some wood chips in the bottom. I spray the wood chips with a little water for a long slow smoke. The wood chips are covered loosely with another piece of foil to catch the drips from the meat while allowing the smoke to filter up around the foil. Then one or two circular racks are fit in to hold up the food, another piece of foil is tented over the top, and then the loose ends of the two large strips of foil on the bottom are brought back and closed up over the whole package, and a lid is put on top to keep it all in. The heat is turned up on high to get the smoke going, and when you can smell the smoke, turn it down to medium or medium-low. Some things like fish can be smoked quickly in less than half an hour, and some meat can take two or three hours.


This was a thick naturally raised pork chop--about a pound and a half--from Tom Mylan's shop, The Meat Hook in Williamsburg, Brooklyn. I rubbed it with a rub containing about tablespoon of salt, a teaspoon and a half of paprika, a clove of crushed garlic, and smaller amounts of pepper, cayenne, sage, and coriander, let it sit for about half a day (overnight would be even better), then smoked it for two hours in the wok.

Here's what it looks like with the lid off--


While you can smell the smoke, it doesn't fill the apartment with smoke in the way grilling a steak in the grill pan or under the broiler at high temperature might. At the end of two hours I turned off the heat, let the wok sit for a bit, turned on the kitchen fan and opened the foil--


The meat was 160 degrees F and moist--essentially done, but I wanted it softer, so I put it in a 200 F oven for another hour, and then finished it off in a cast iron grill pan under the broiler for a few minutes on each side to get the result visible in the top photo. The meat was tender, smokey, and tasty, just like it should be.

Bookmark This Site


Powered By Blogger